

Processing an Order
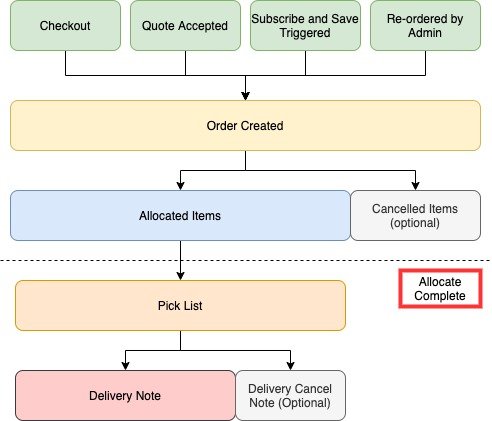
Orders from any source must be Allocated, Completed & Delivered. Invoicing can happen any other time.
- Orders are generated from any source, such as Checkout, Accepted quote, Subscribe and Save trigger or Reordered.
- Order items are then allocated or cancelled. This is confirmed and locked by the "Complete" action.
- Pick lists are either delivered or "deliver cancelled".
-
Invoicing can happen at any point using the Invoice actions. We recommend taking payment as swiftly as possible and crediting if you fail to ship picked items.
-
There are workflows that can connect these stages together automatically, such as "on order -> Invoice order".
1. Sales > Orders
Go to Sales-> Orders to see an overview of your orders.
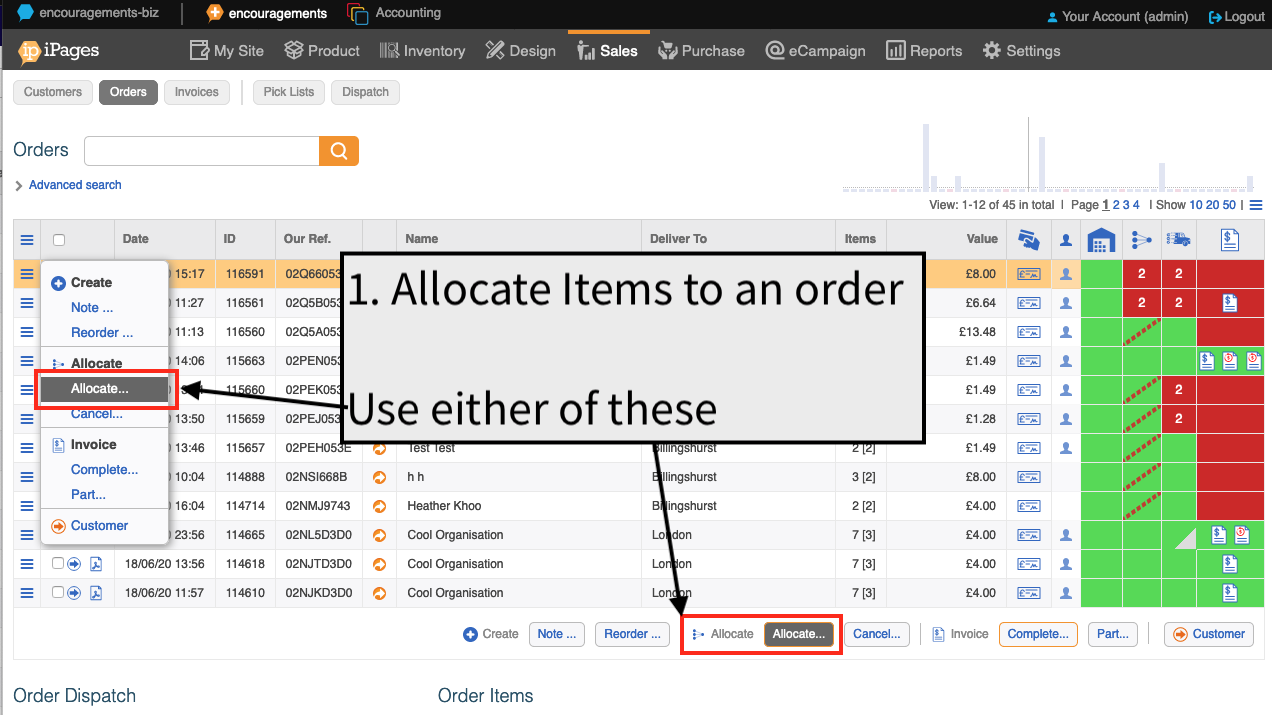
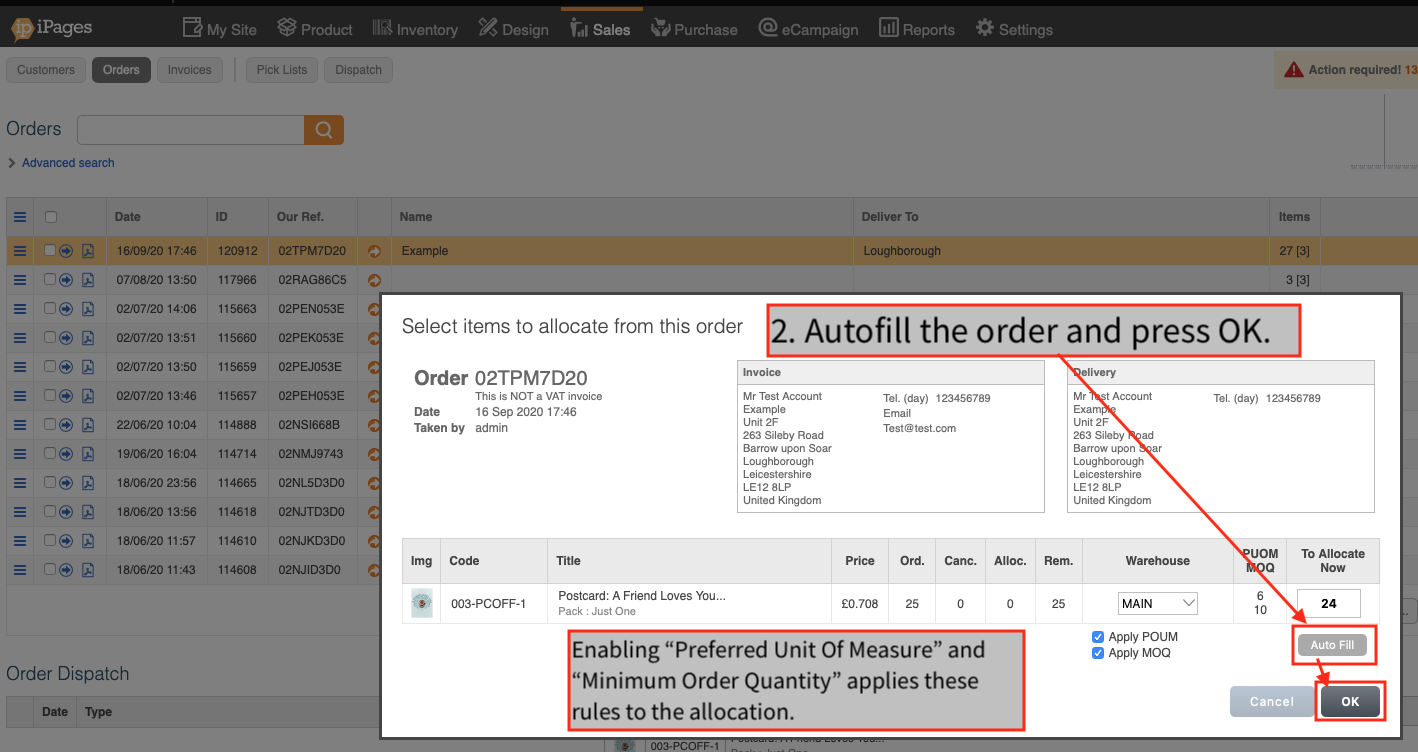
2. Allocate Items
Use the workflow "On Order Checkout Completion -> Allocate and Allocatable items" to automatically do this for you.
The Allocate button will not appear if there are insufficient funds to issue an invoice. You may need to make a manual payment at this stage, instructions of which are here.
NB If your item is out of stock, or not in the inventory, then you will need to either adjust your stock levels, or add your product to the inventory.
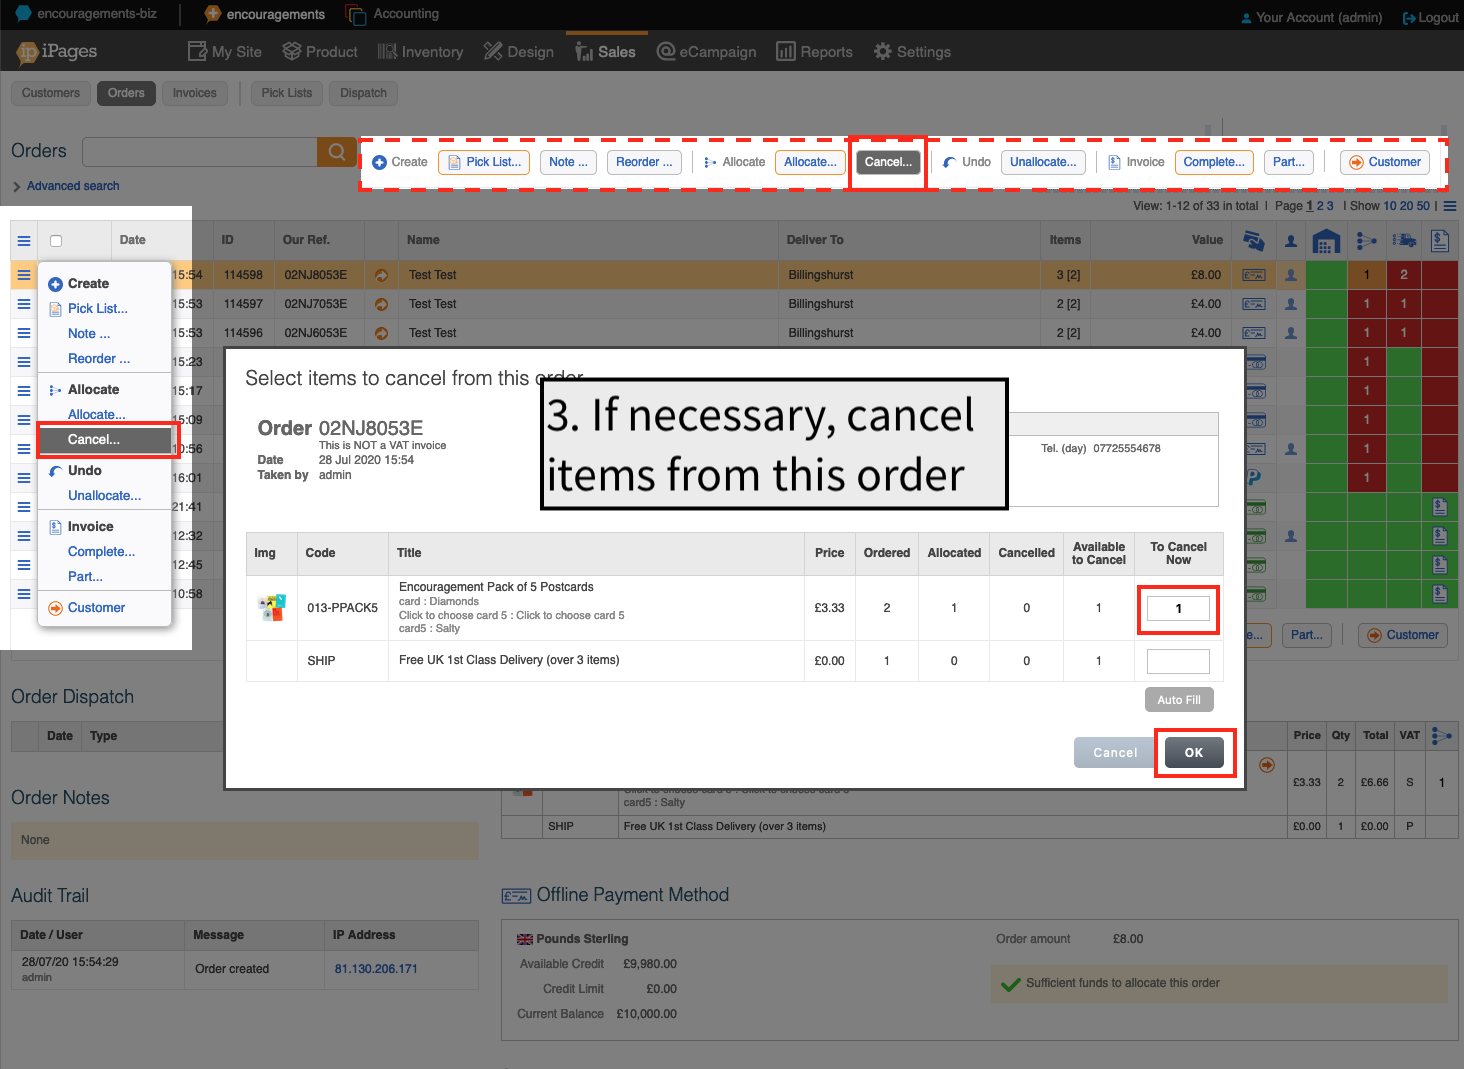
3. Cancel any items if necessary.
Be careful not to cancel the shipping, unless you want to ship it for free!
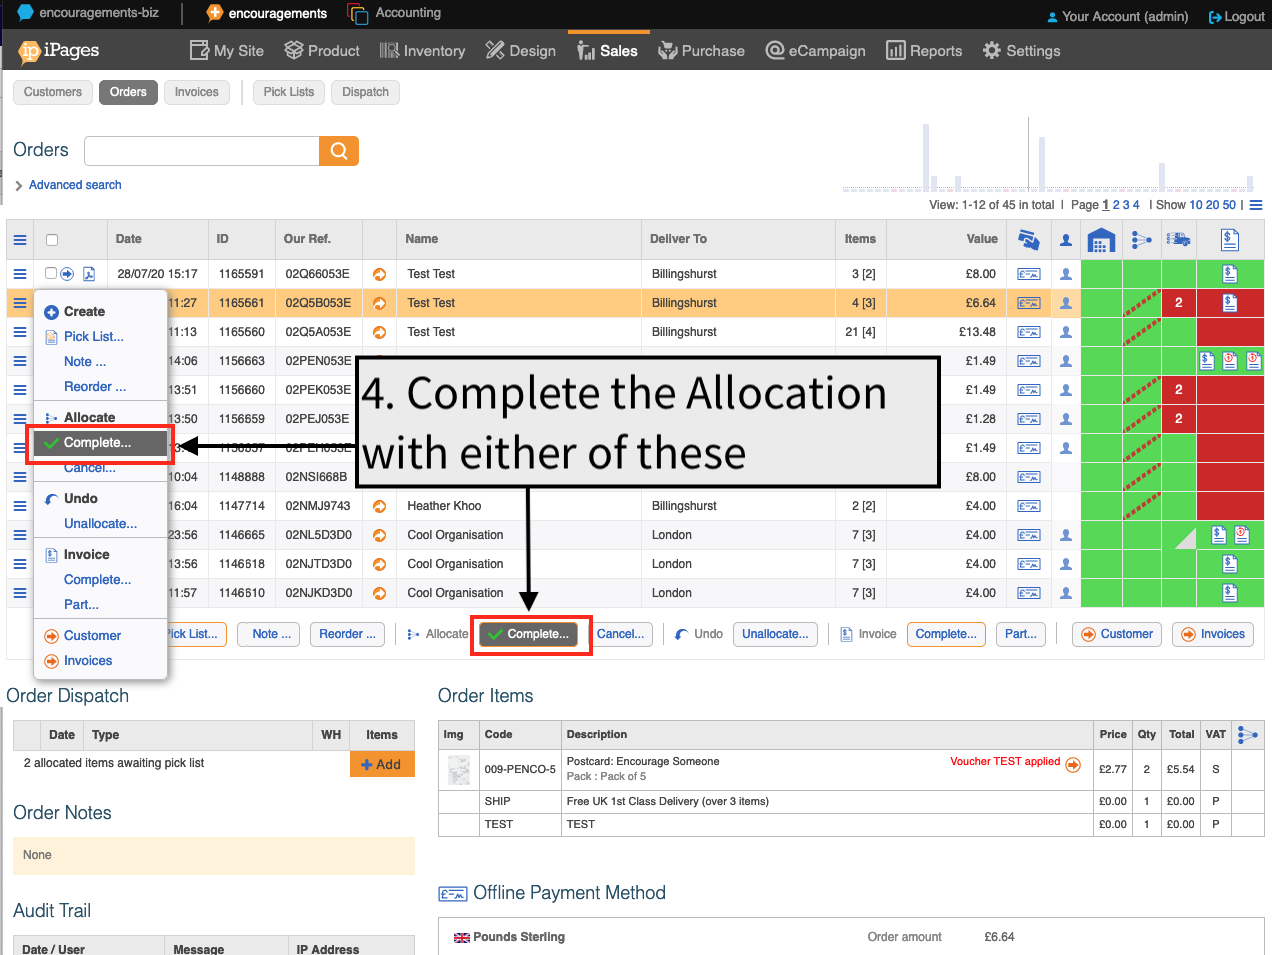
4. Allocate Complete
This step will create a pick list for any stock controlled items.
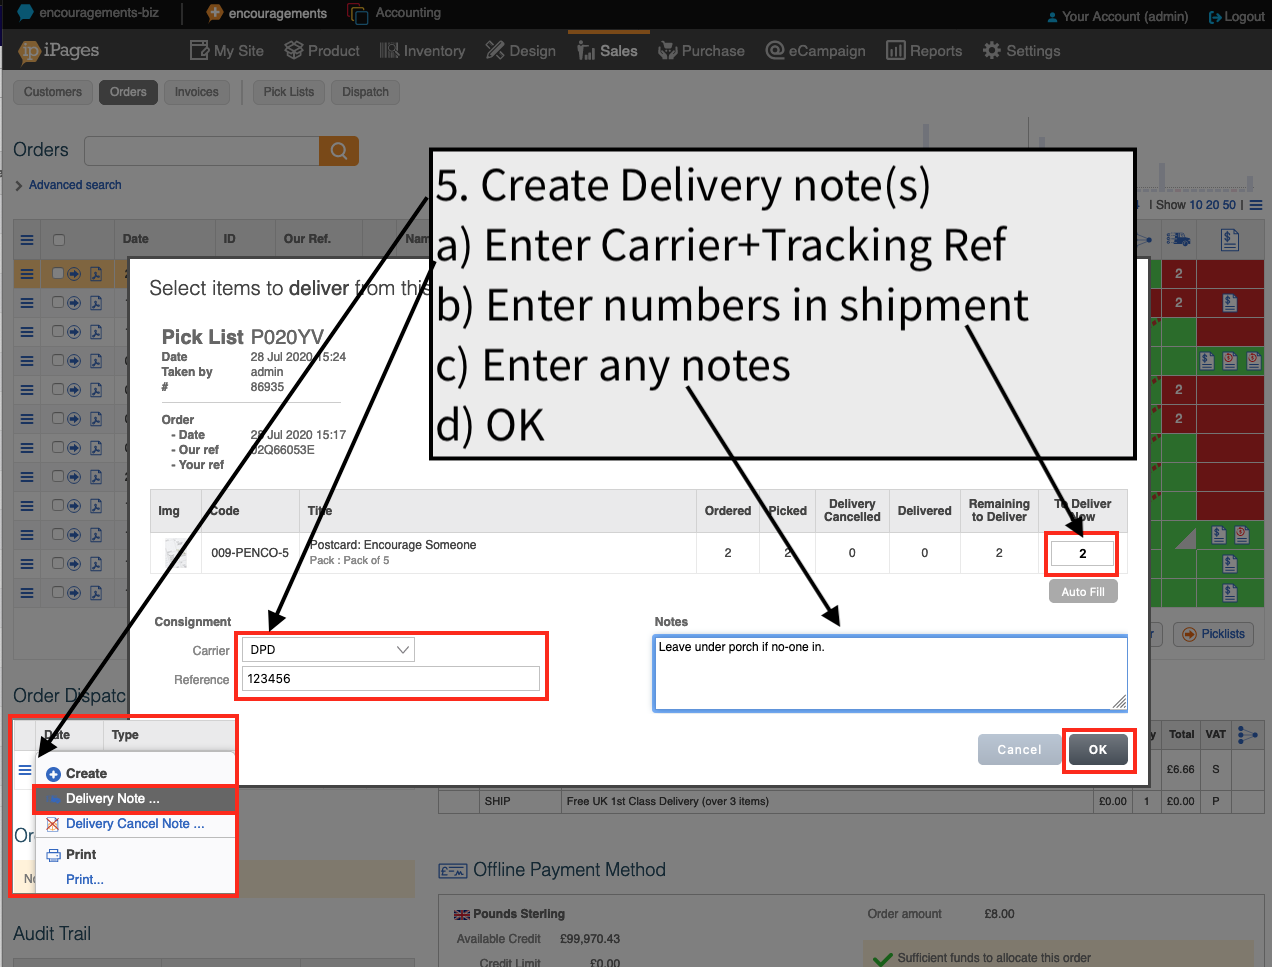
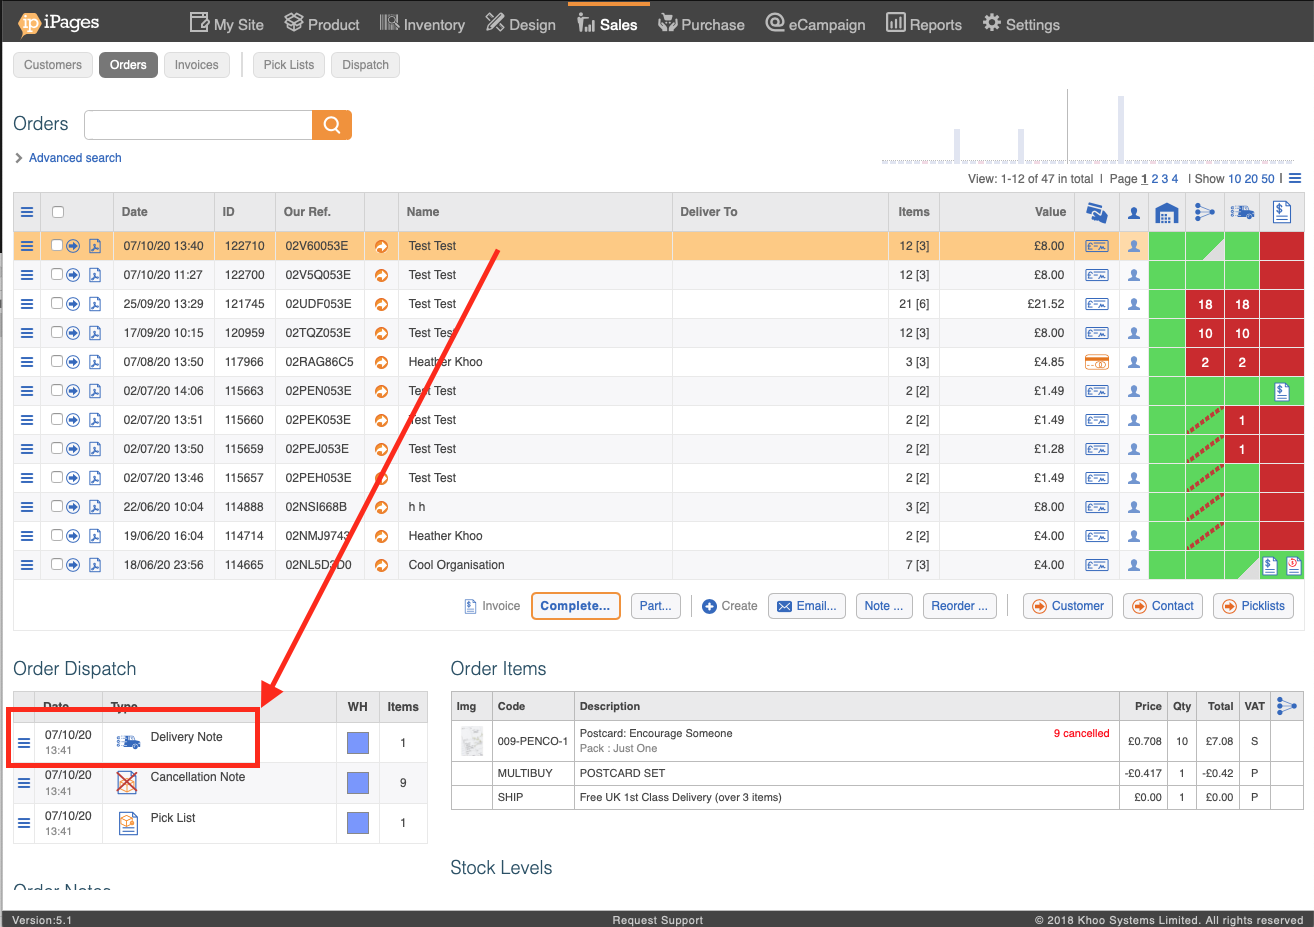
5a. Create a delivery note from the "Order Dispatch" Section
The Order Disptch Section can be found at the bottom of the Order table. For a more complete overview see the pick list in your Order Processing screen, but if you click Allocate Complete a pick list will made for you.
To create the Delivery note(s) follow the steps below.
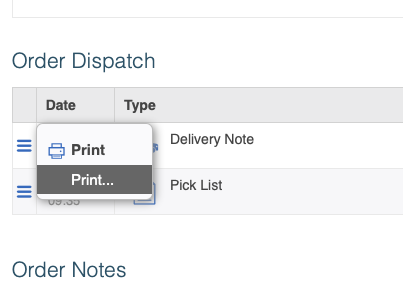
5b) You can then print this delivery note by hovering over the "Delivery note" and clicking "Print"
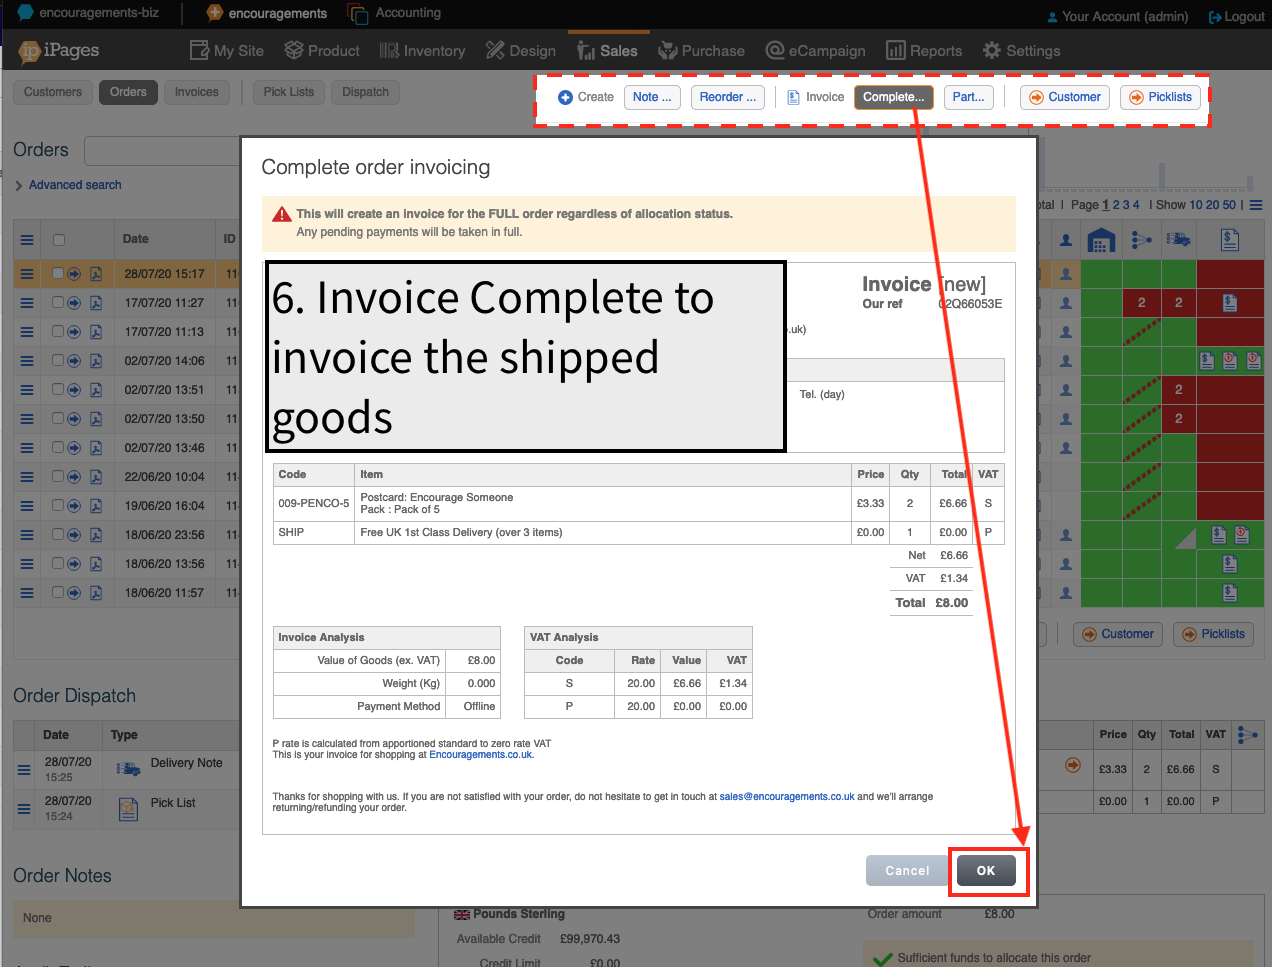
6. If not yet done, Invoice Complete will invoice for the shipped items.
If you want to automate this, turn on the workflow "On delivery note created -> Invoice the items on the delivery note".
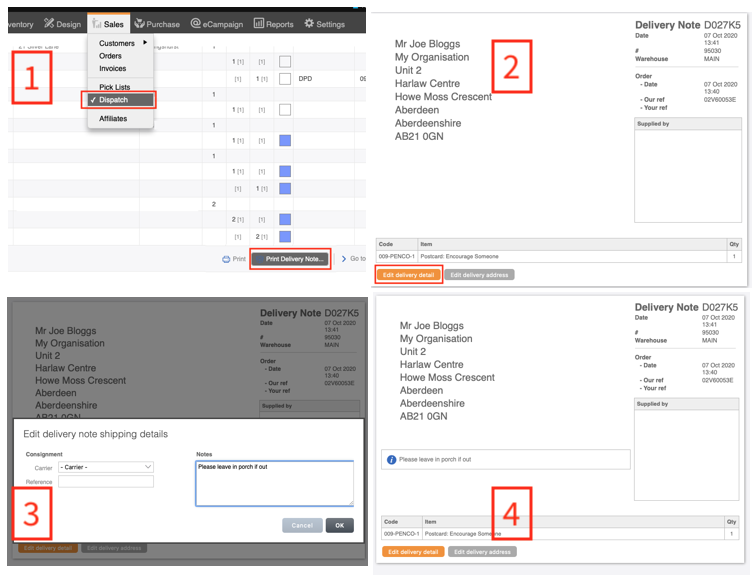
7. If necessary, add special instructions again or amend the delivery address
Go to "Dispatch" and find the dispatch note.
Click "Print Dispatch Note"
Click "Edit delivery detail"
Add extra notes or amend the delivery address -> OK
Updated notes and order displayed for printing.
8. Print Delivery Note
There are several places to do this.
8a) Sales -> Orders -> Order dispatch
8b) Pick Lists - Select Pick List -> Print Delivery note.

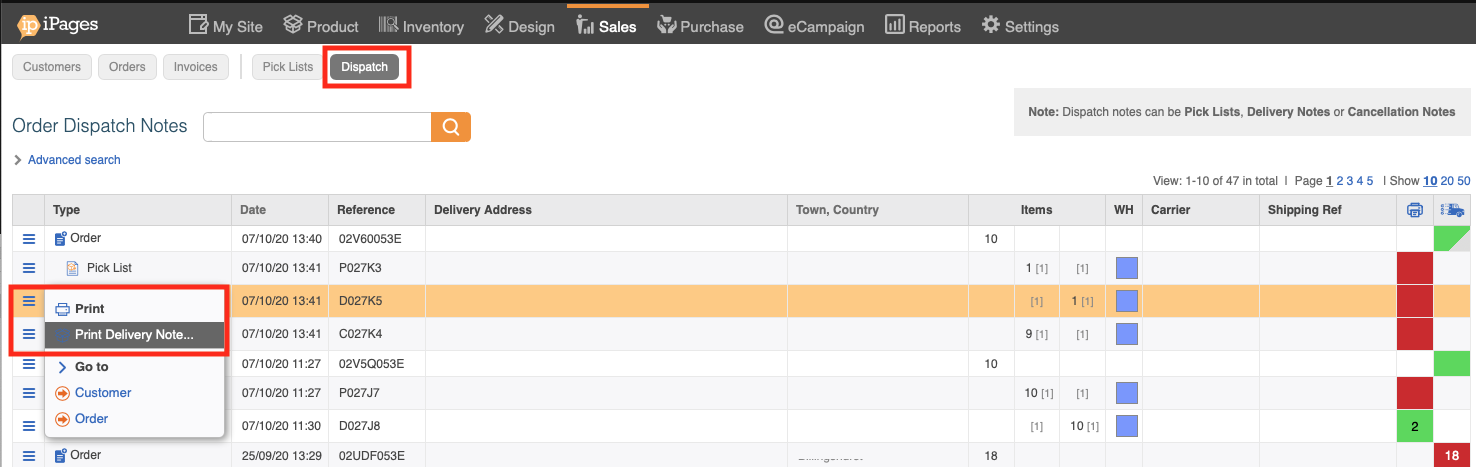
8c) Sales -> Dispatch -> Print Delivery note.
9. Optional: Setup Delivery Note Style
This will change the way the delivery note prints when you print it out. You can use integrated labels to position the sticky label correctly.

Top tips:
1) The Order screen is mainly for stock allocation status
2) The Picklist screen shows dispatch status in detail
3) It is best practice to Allocate complete all orders as quickly as possible
4) If you don't use the dispatch process, use the workflow "On pick list creation -> Create Delivery Note".
5) Use Pick List - Advanced search - "Items to Deliver Greater than 0" to search for any outstanding deliveries.
6) Use Auto Allocation and Auto Invoicing workflows to save you time.