Set Up Stock Control
This assumes you have no stock control setup. If you want to add products to an existing setup, skip to step 7a or click here for a one-by-one guide.
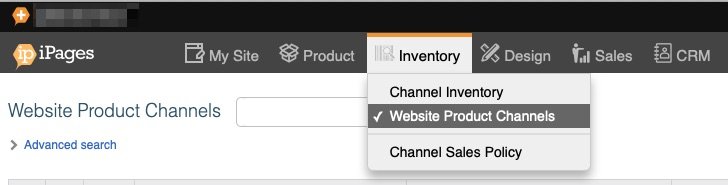
1) Go to Inventory -> Website Product Channels
2) Advanced Search -> In inventory = NO -> Search, then Show 1000

3) Tickbox at top will Select All -> Update to Inventory and Channel. Repeat for all pages (you may have >1000 items).
This will add all your products to your inventory. If you don't want certain items to be stock controlled, either give them infinite stock or remove them from MC Inventory.

4) MC Inventory -> Setup -> Warehouses, check "MAIN" is there. Or, Add a new warehouse with the "+Add" Button.
"MAIN" is the default warehouse, and you can add additional warehouses if you need them.

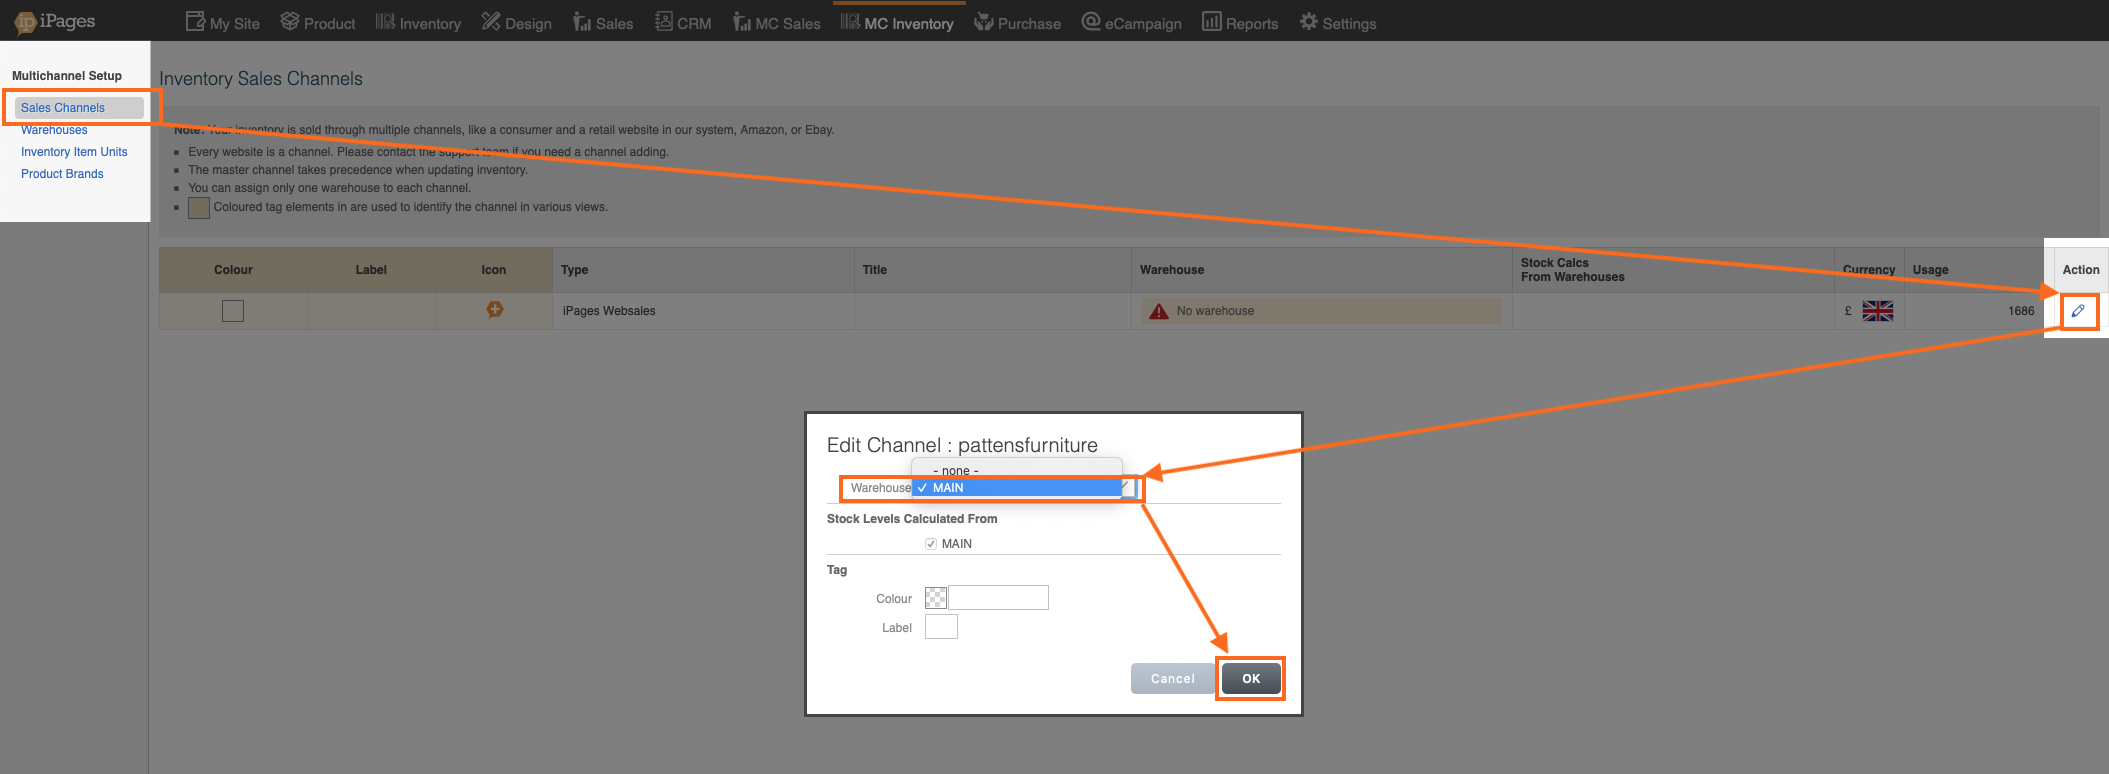
5) MC Inventory -> Sales Channels -> Choose channel, edit. Add Warehouse to channel.
If you have multiple warehouses you can calculate the stock levels from multiple sites here.
If you have several channels you could assign a warehouse to a specific channel, or one warehouse to many channels.
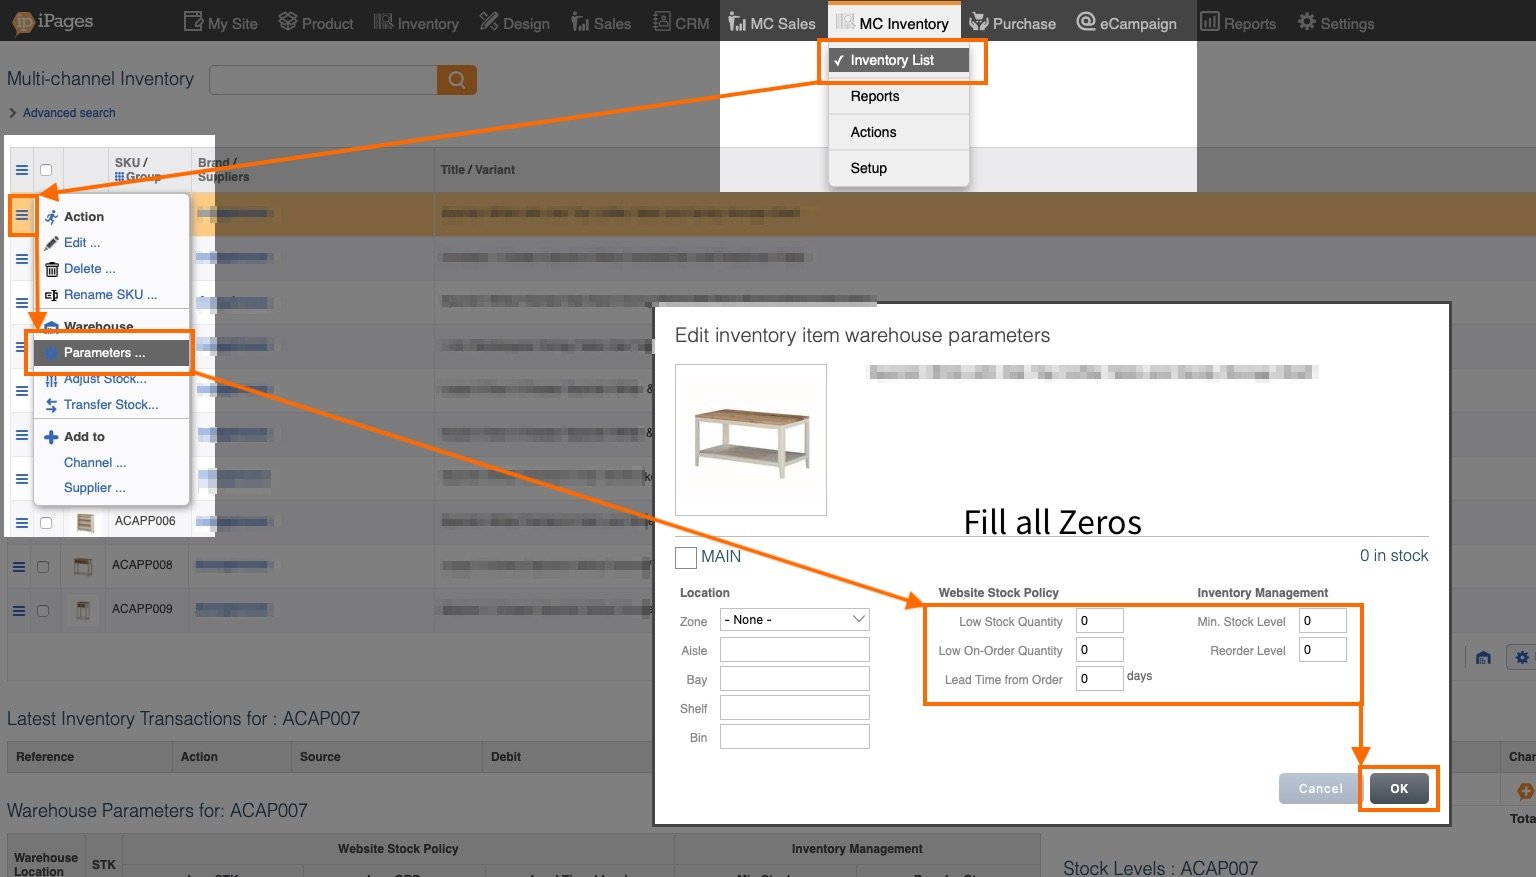
6) MC Inventory -> Inventory List -> Choose top item, left hamburger -> Parameters
You can set these to any number, but for this example we are choosing 0s. For more information on Parameters click here.
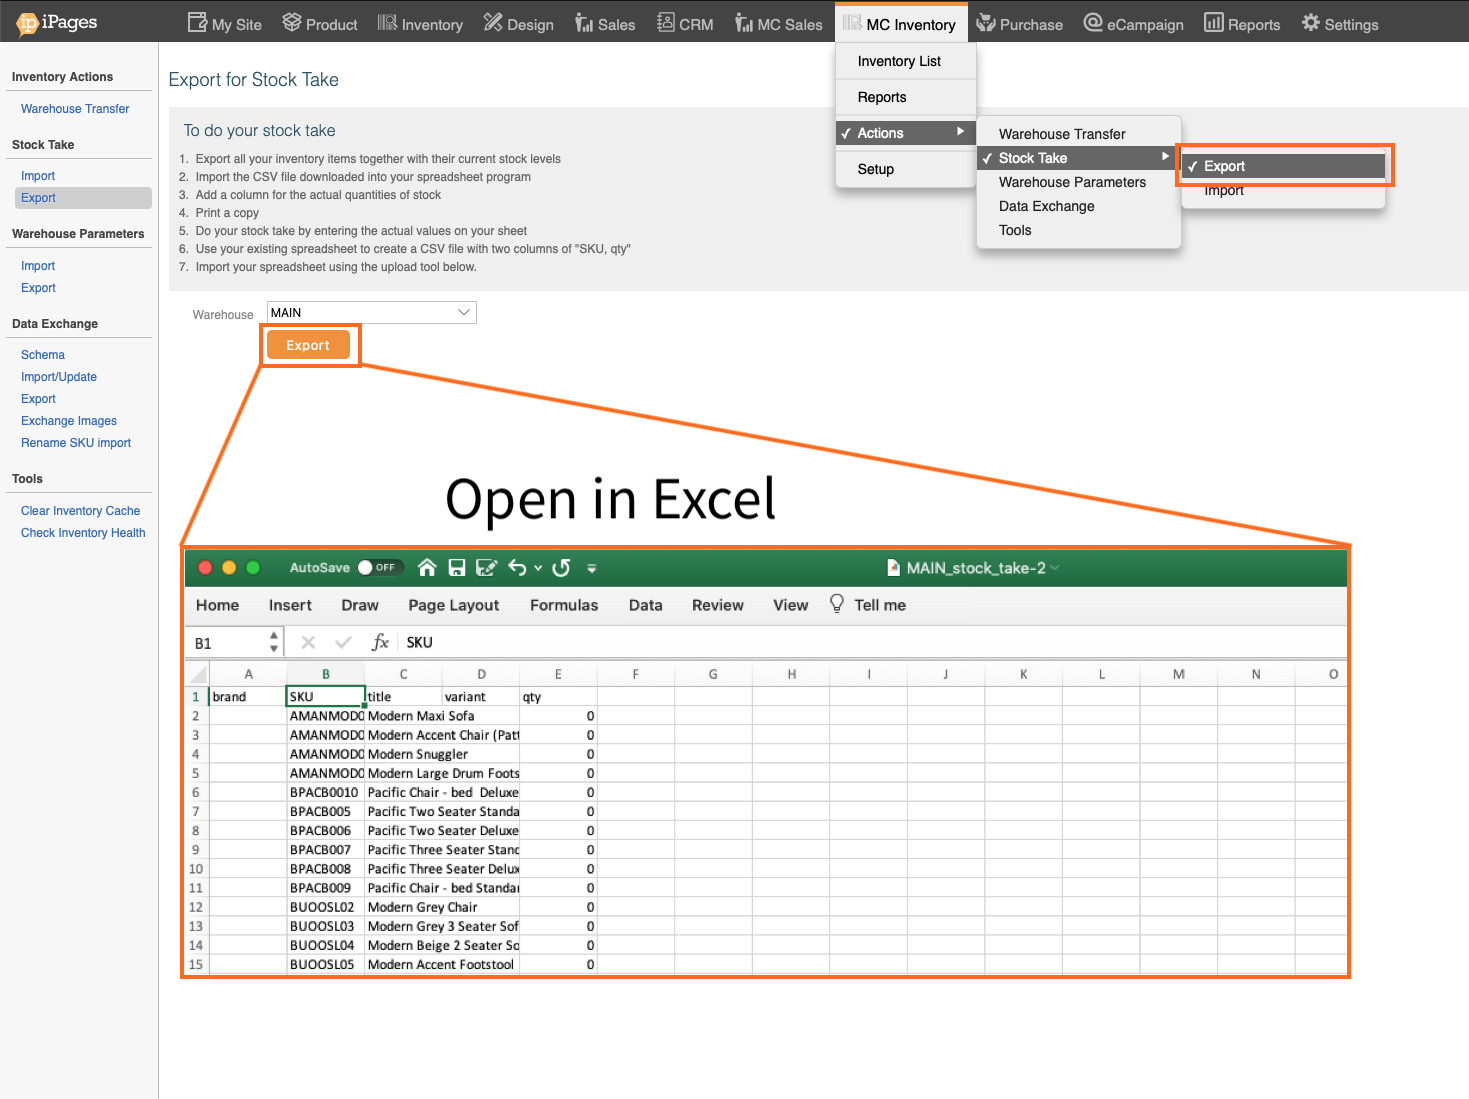
7a) MC Inventory -> Actions -> Stock Take -> Export -> Open in Excel
This is the first spreadsheet we need open
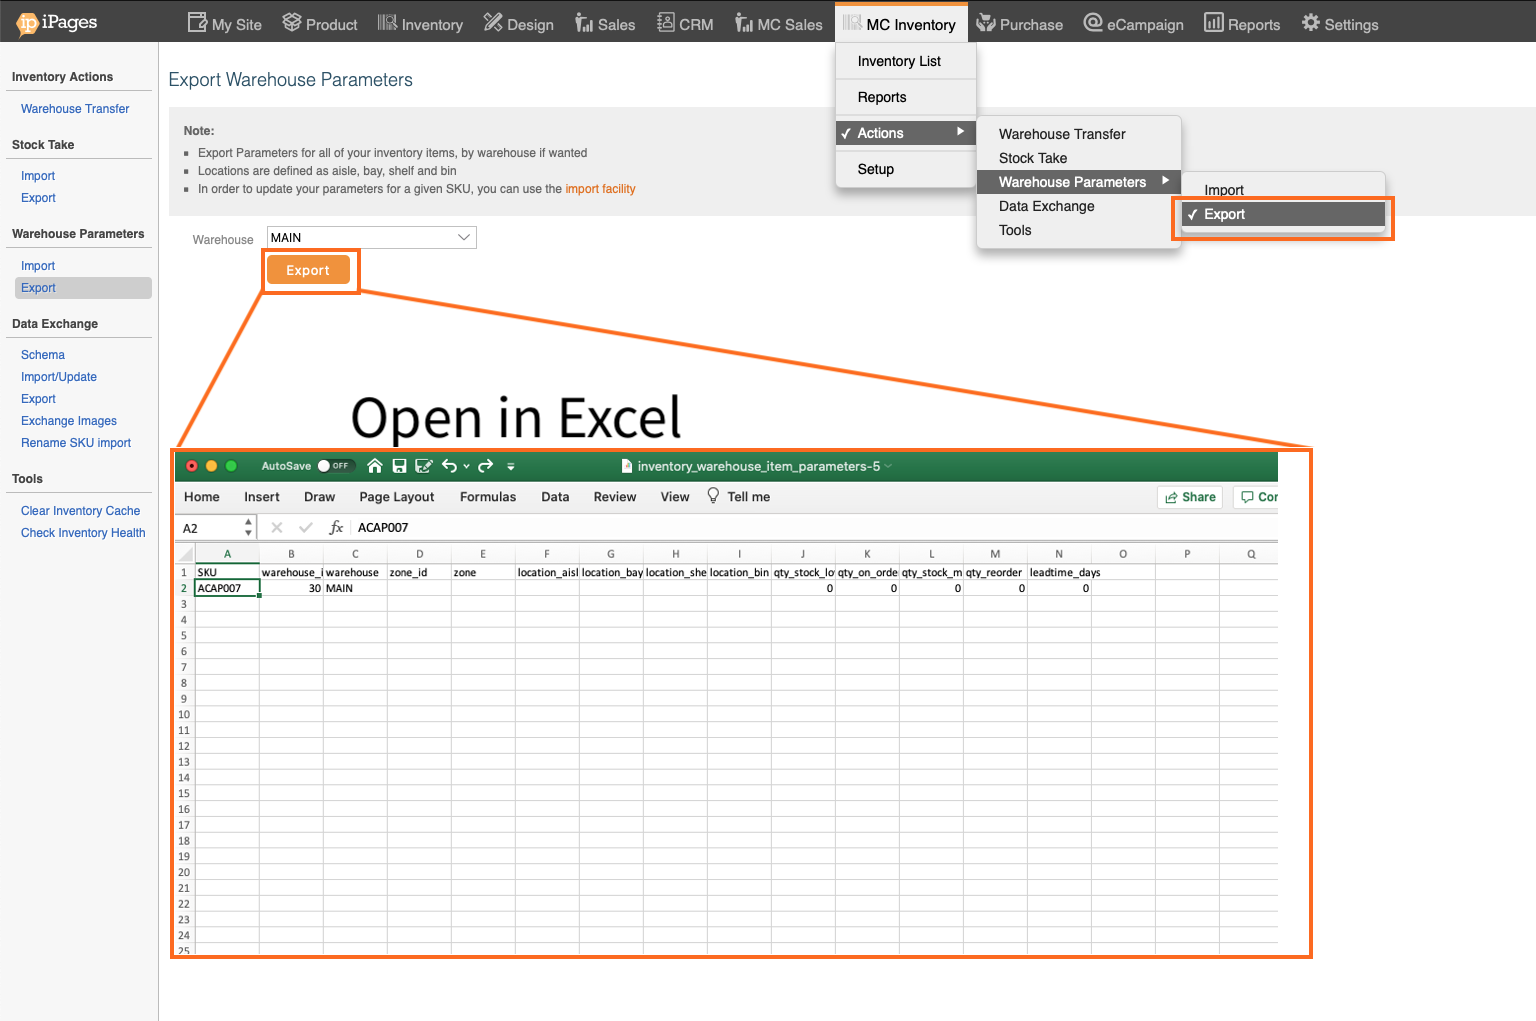
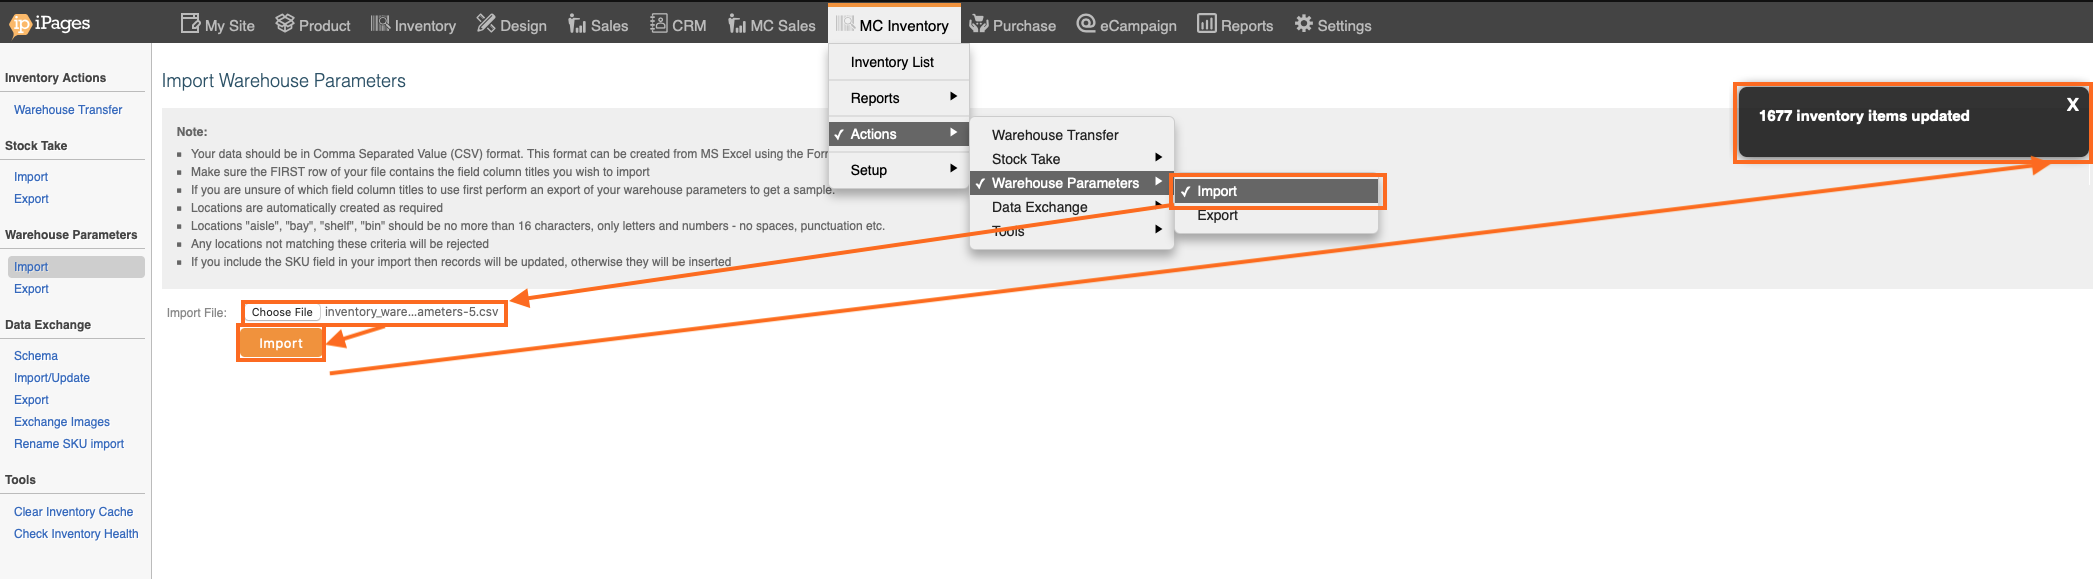
7b) MC Inventory -> Actions -> Warehouse Parameters -> Export -> Open in Excel
This is the second spreadsheet we need open
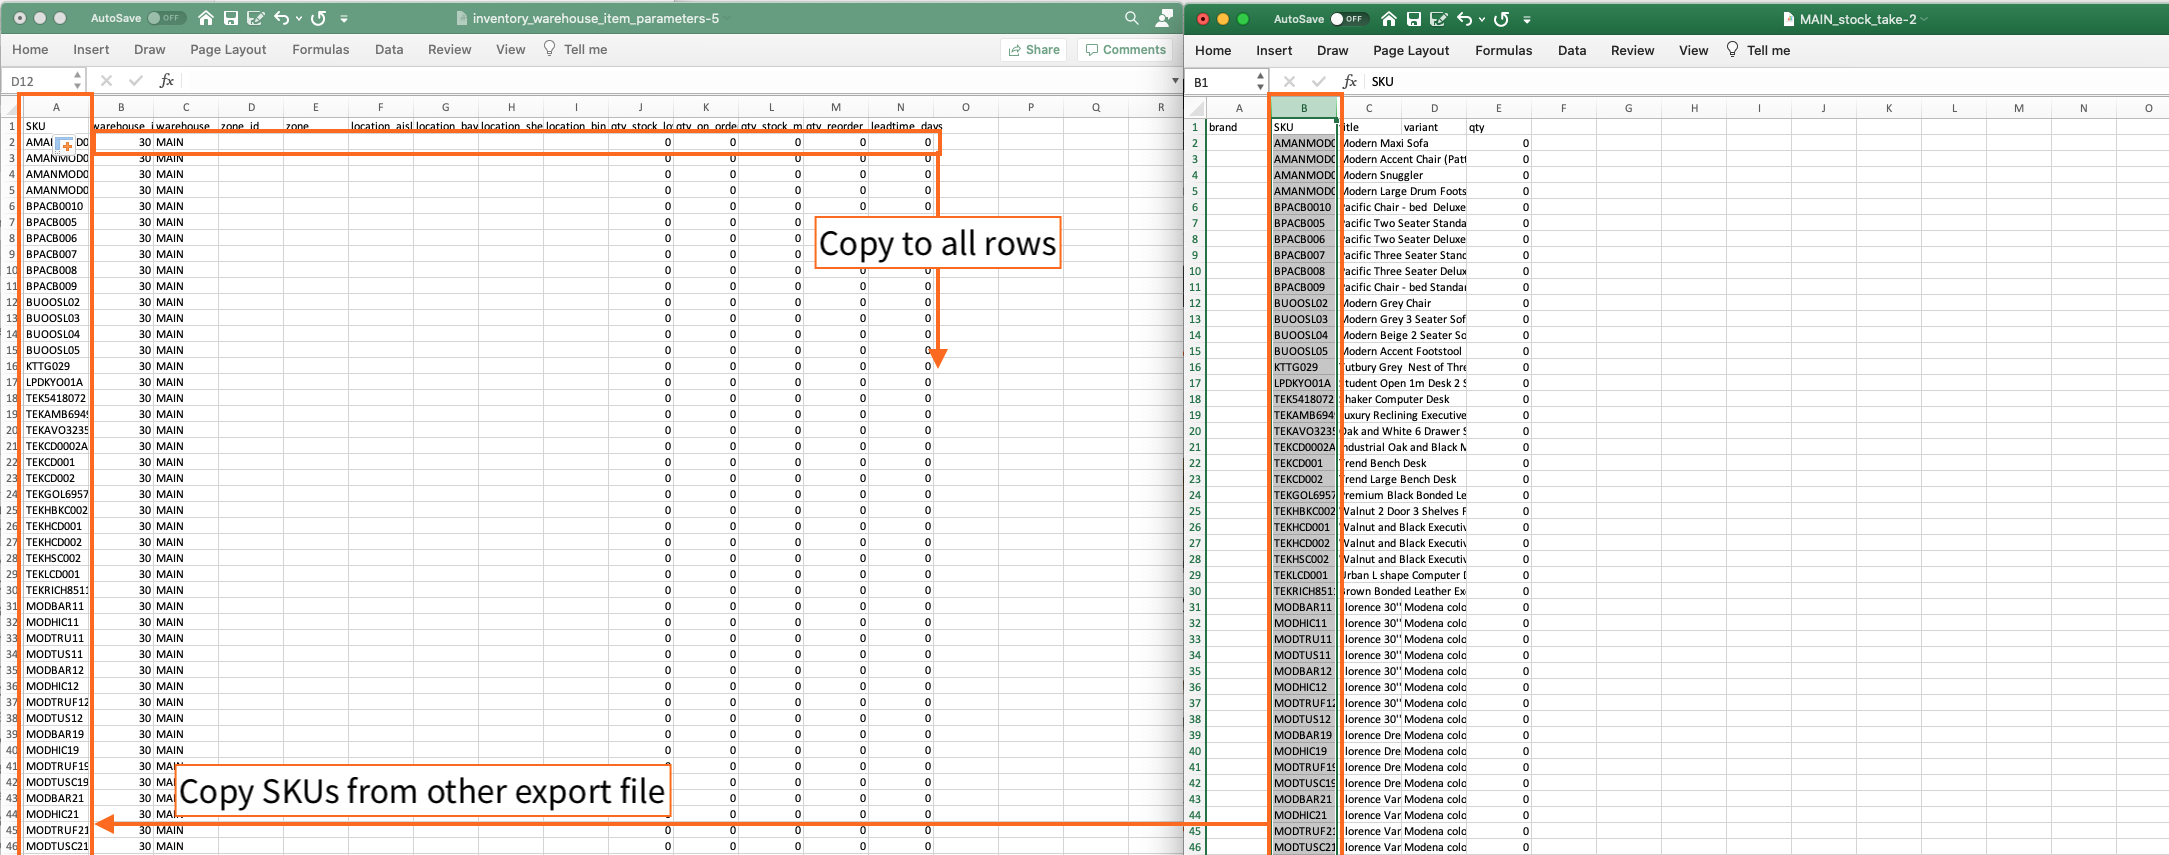
8a) In Excel, Copy the SKU column (column B) from the Stock excel sheet into the Parameter excel sheet (Column A).
8b) In the Parameter sheet, copy and paste the top row (row 2) down to duplicate to all other rows. This will set the parameters of all items to 0s.
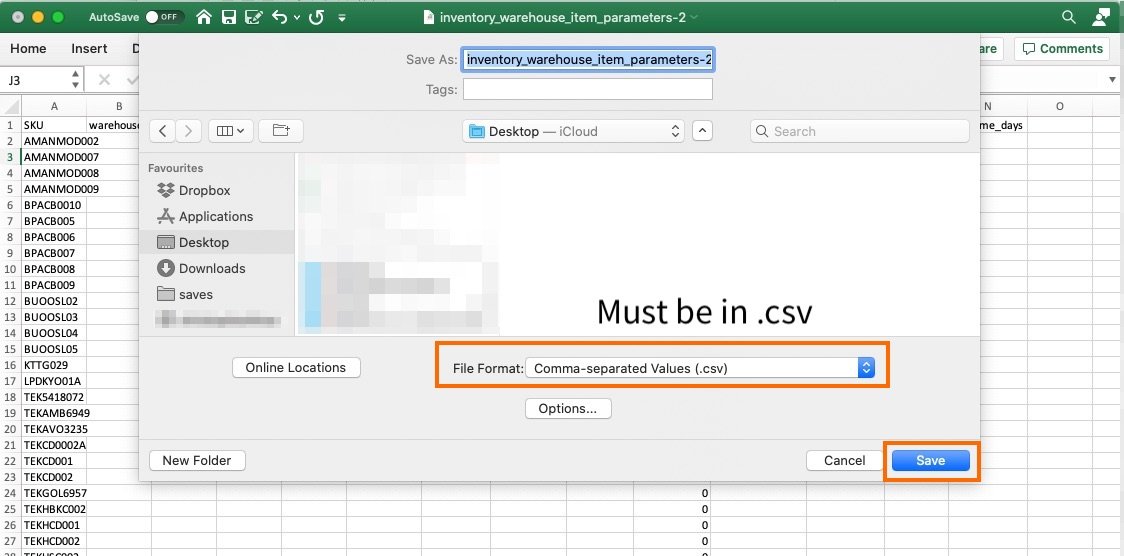
8c) Export the parameters file as a .csv file.
9) MC Inventory -> Actions -> Warehouse Parameters -> Import. Import your saved .csv File.
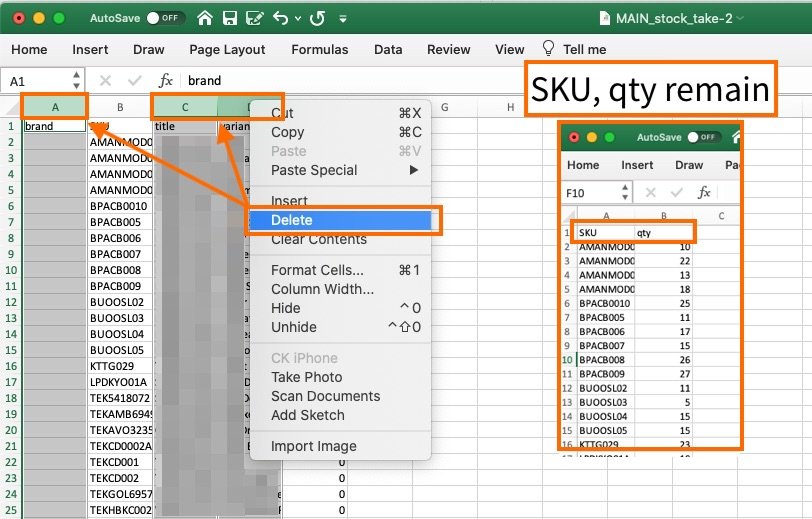
10) With the other excel sheet, delete the columns for brand, title and variant, leaving only "SKU" and "qty". Then, fill in the quantity (qty) for each item.
Save as a .csv
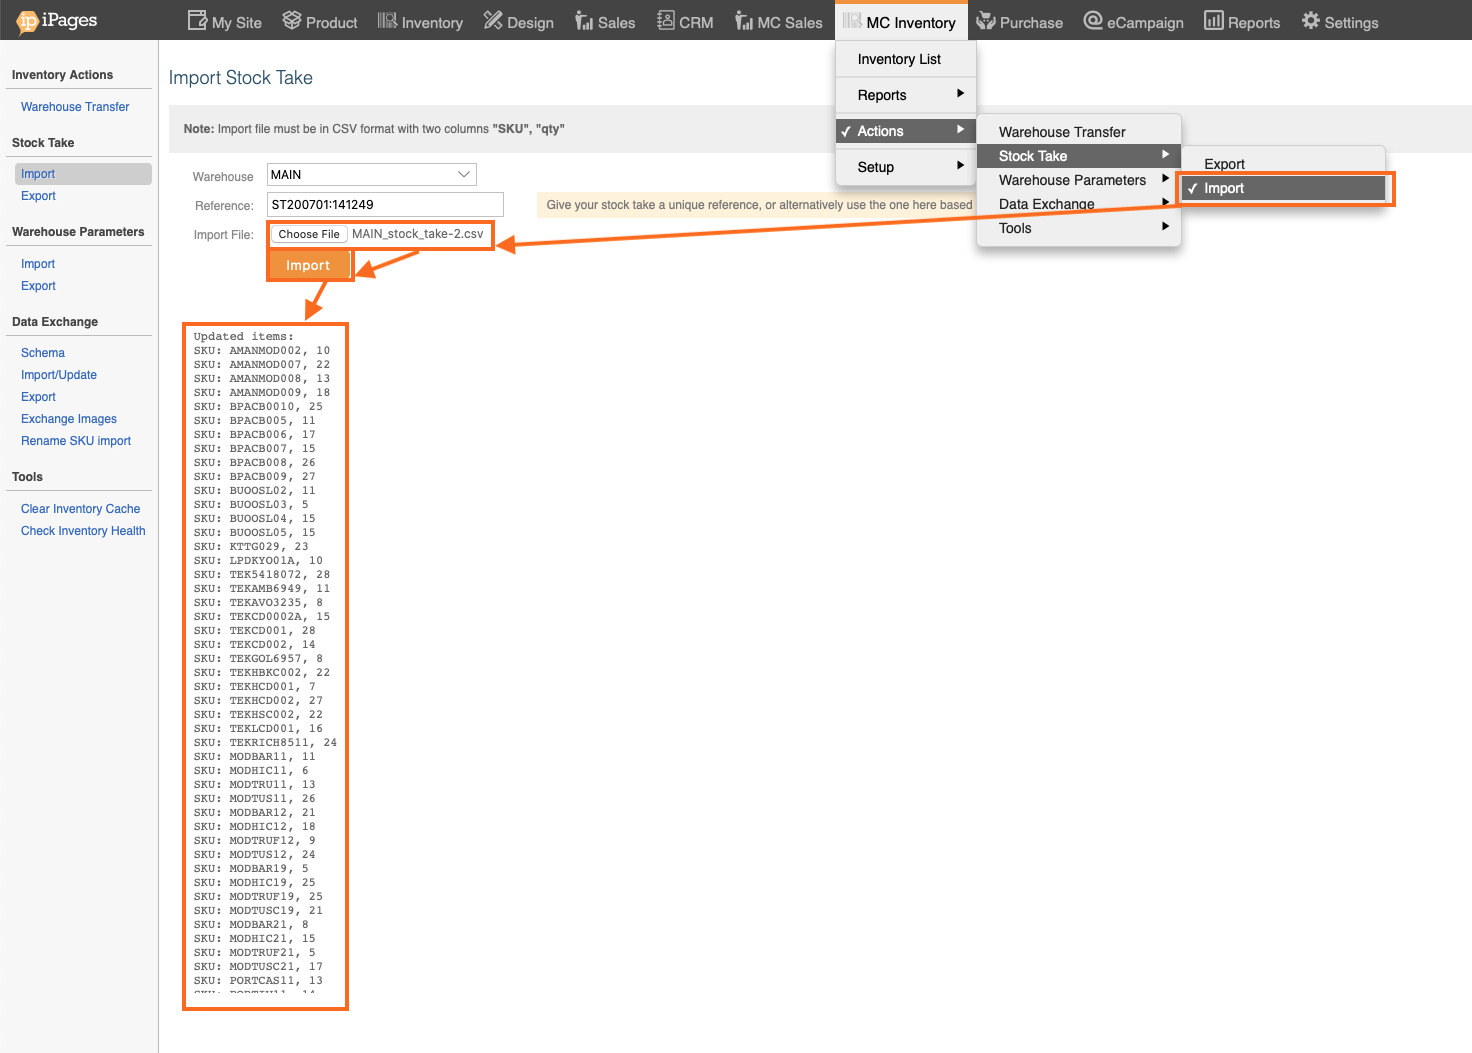
11) Import this csv into MC Inventory ->Actions -> Stock take -> Import
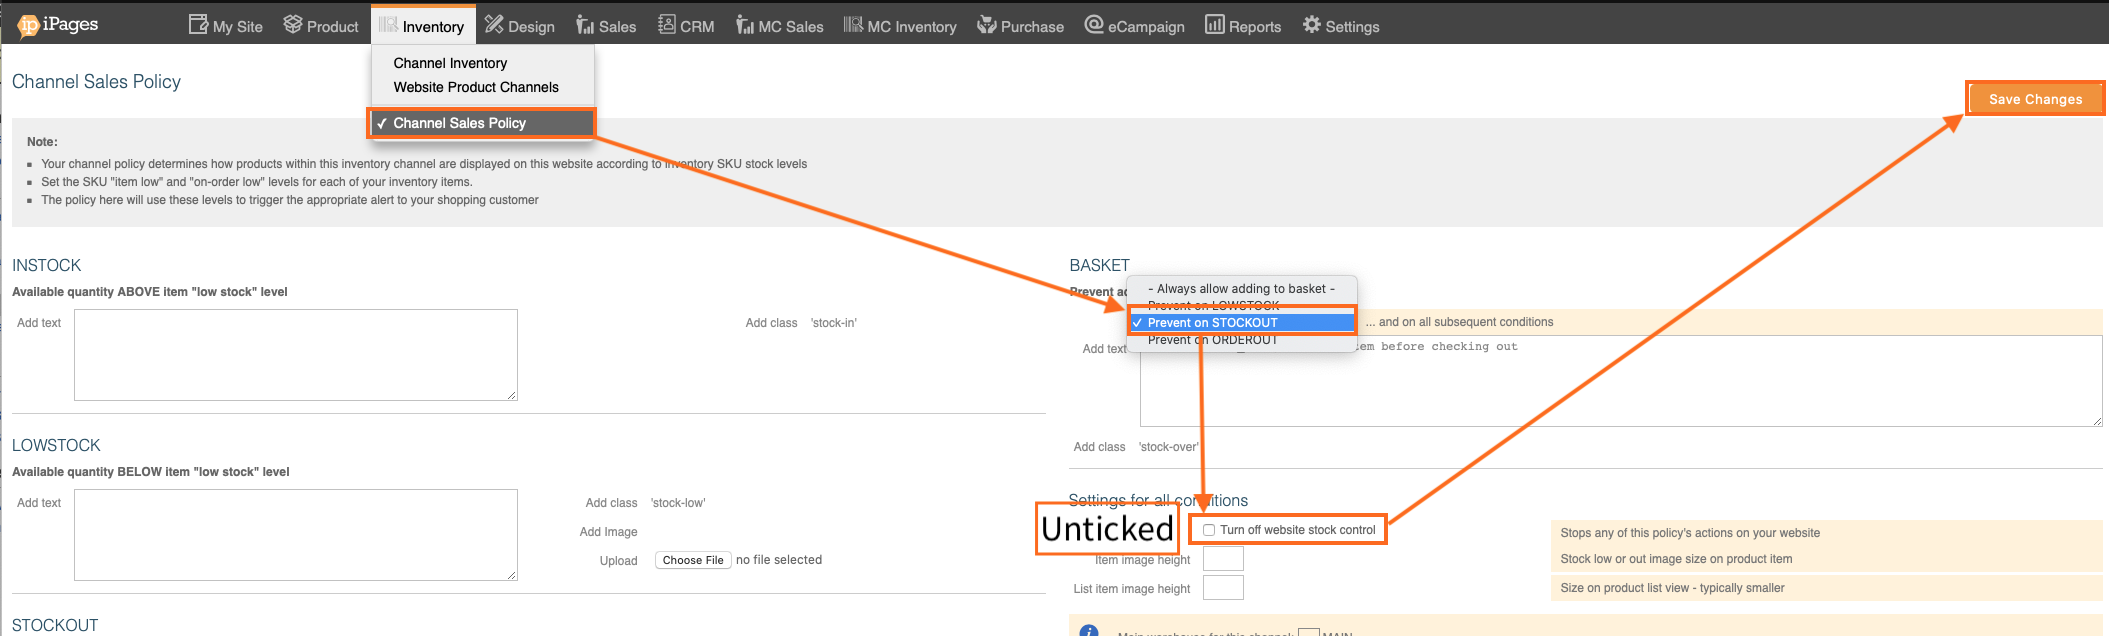
12) Navigate to Inventory -> Channel Sales Policy. Choose the option "Prevent on Stockout", ensure that "turn off website stock control" is unticked, and press Save.
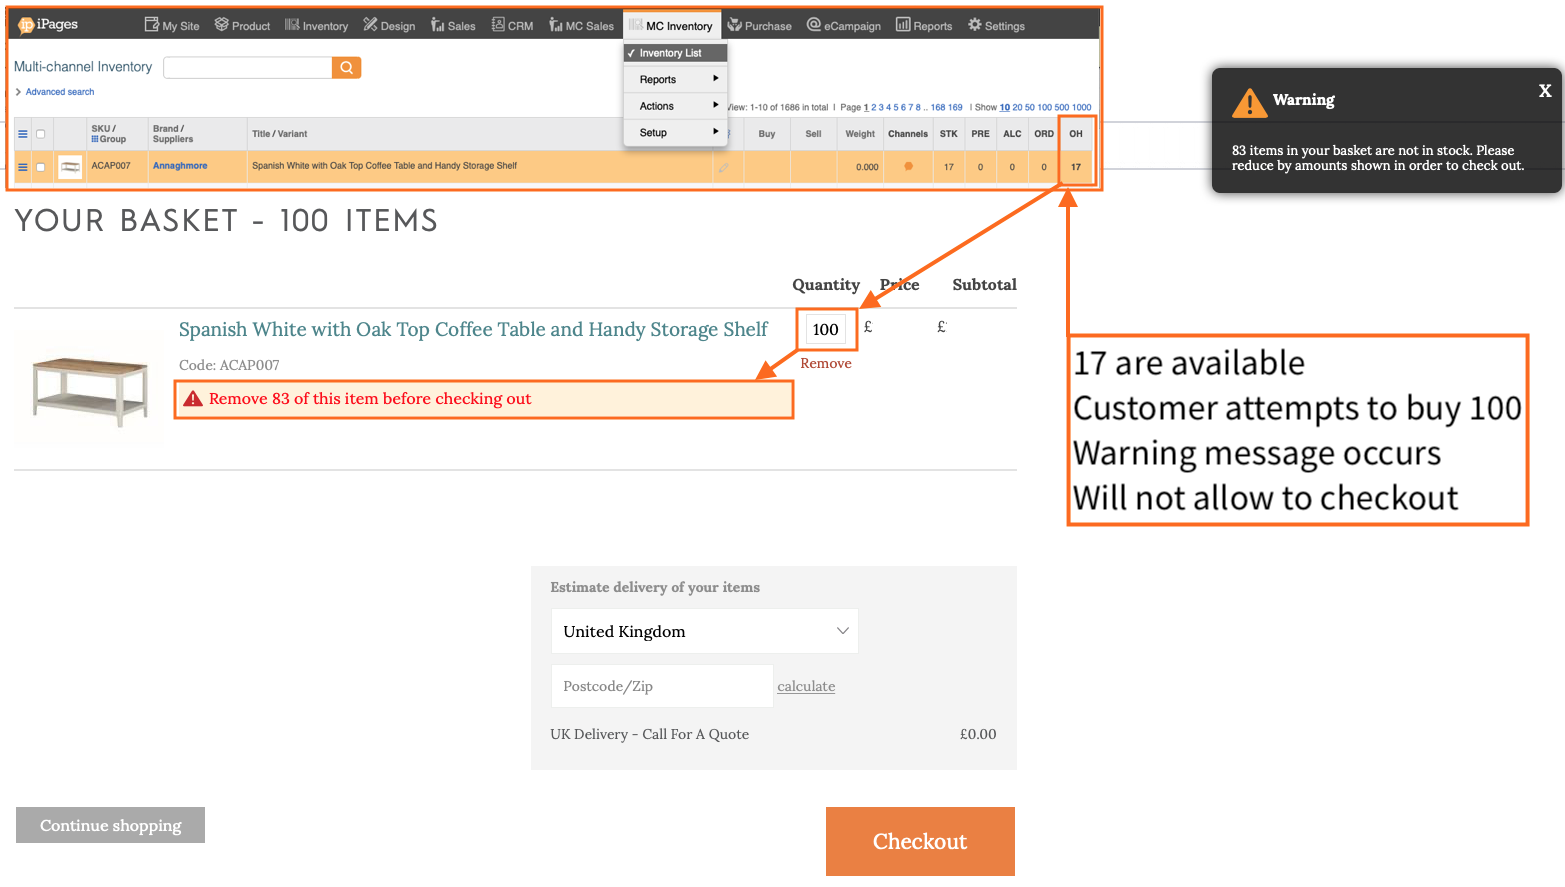
You can customise the text at this stage to alter the warning message using the variable fields in the yellow box. eg "Remove {stock_over} of this item to checkout" will insert the number that is over the available stock.
12) Finished! Here you can see that with 17 in stock, a warning displays on the basket to prevent a customer buying more than are available.