Adding images to a gallery
On this page:
The Media Gallery has areas to add images/files to each type of gallery. In the image below, you can see headings for 'Images', 'Files', 'Audio/Video', and for 'Browser/FW Background Gallery'.
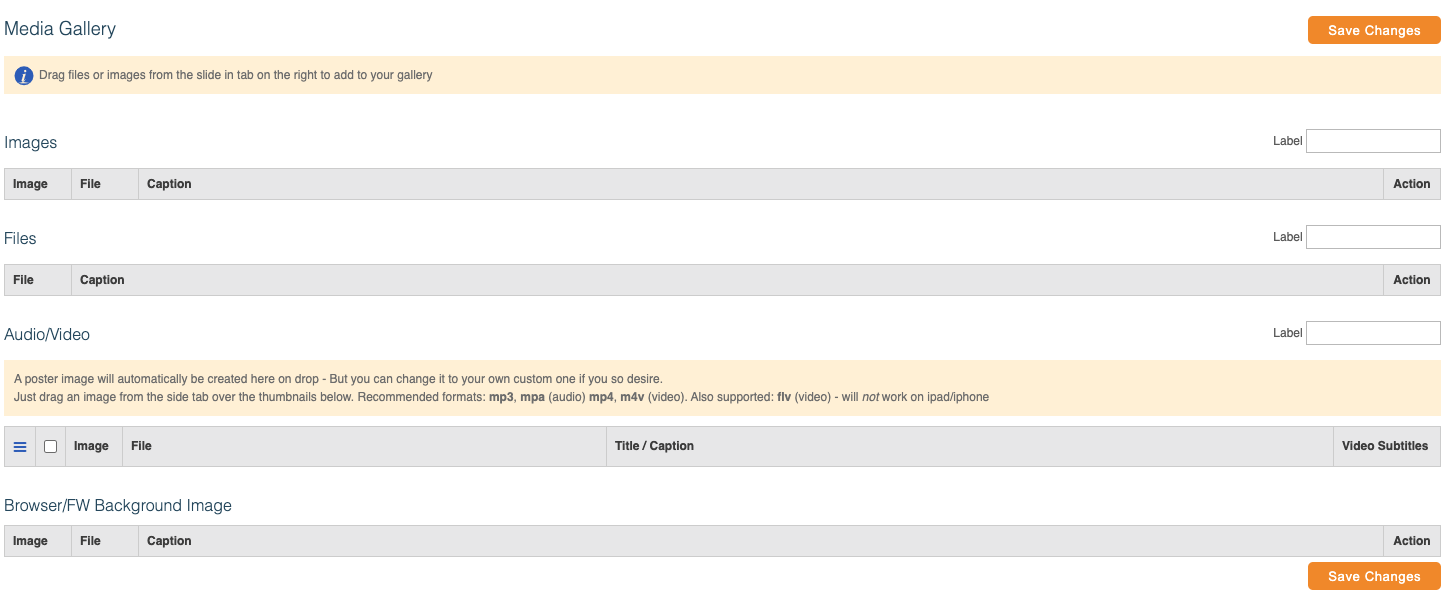
The 'Images' gallery is used generally for product images and for images within a page or blog post.
The 'Files' Gallery is used generally for adding pdf files or catalogues to download on a page.
The 'Audio/Video' Gallery is used generally for adding audio or video content to a page although we recommend streaming from YouTube or similar for video content for improved Search Engine Optimisation.
The 'Browser FW/FW Background Gallery' is generally used for the full width banner at the top of your website page.
Adding Images to the 'Images' Gallery
The 'Images' gallery is used generally for product images or blog items. From your KhooSeller Dashboard, go to My Site > Pages.

Click on the page in the Tree View and go to Edit > Media Gallery.

Open the image upload area by clicking on the image icon on the right-hand edge of your screen.

Click 'Add Files'.

Click 'Upload'.
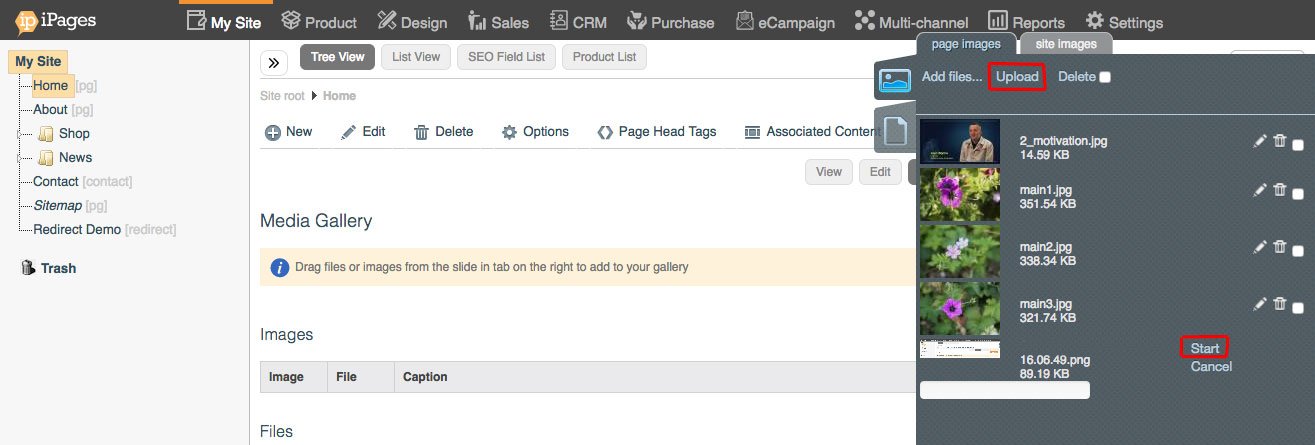
When your upload has finished, you can drag and drop the image into the image gallery.
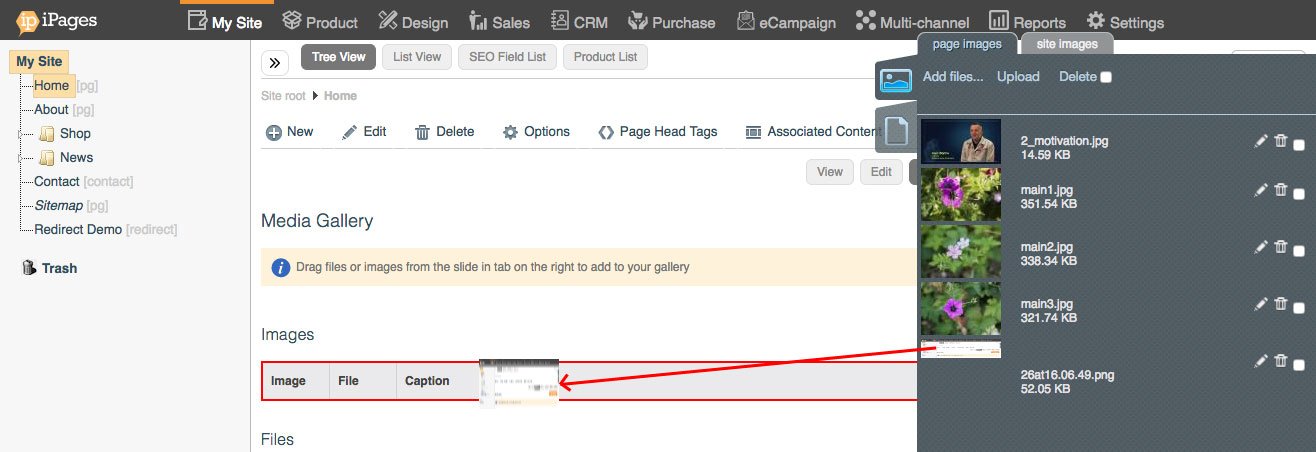
When you've dragged in your image, you'll see it appear in the image gallery. If you have multiple images, you can arrange them by dragging them above or below one another.
More Information
Information
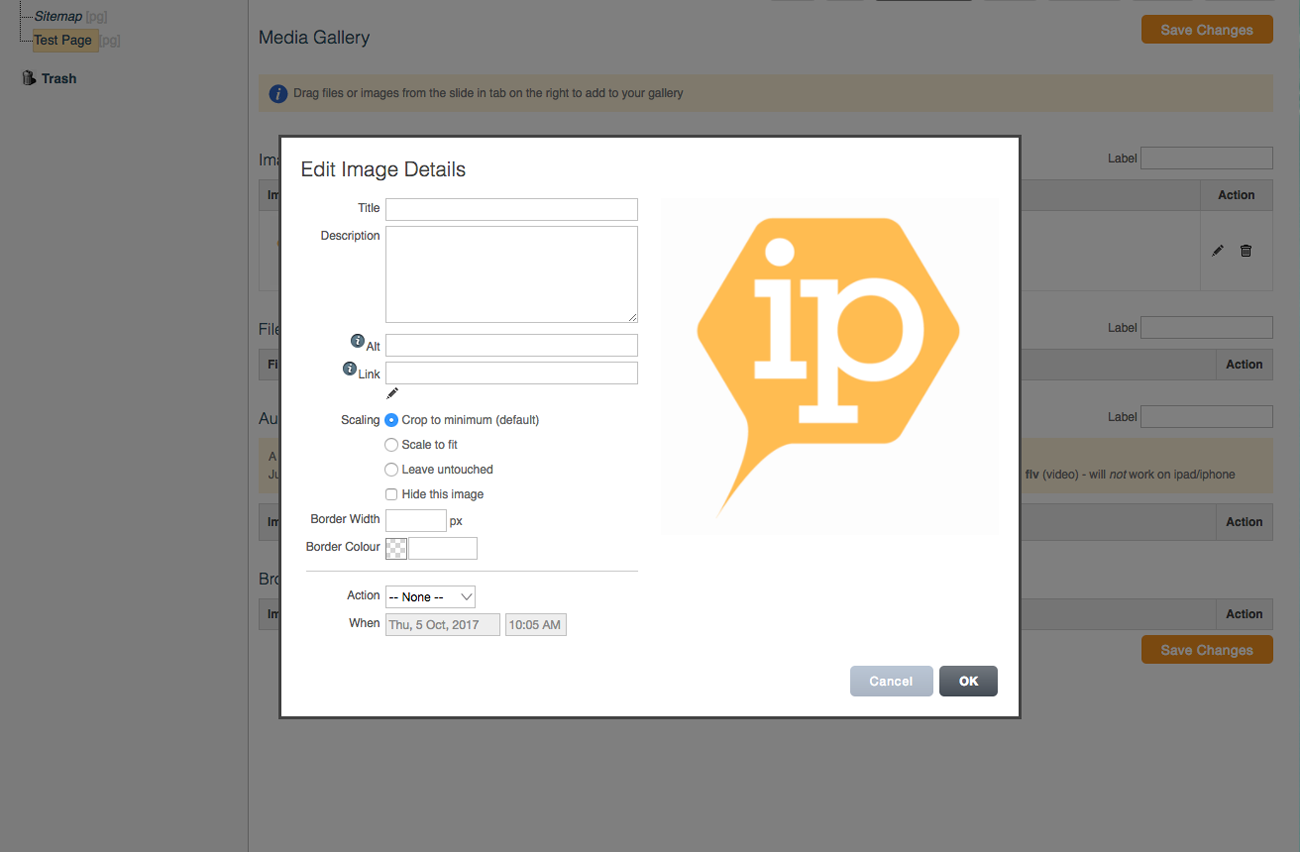
Clicking the icon will open a dialogue with additional options for your images.
Title
Here you can give your image a title. This is then displayed alongside your product image. By default, this is turned off.
Description
Here you can give your image a description. This is then displayed alongside your product image. By default, this is turned off.
Alt Tag
Here you'll be able to give your image an alt tag. This is used for accessibility and SEO, giving a text alternative to non-textual content.
Link
Here you'll be able to assign a link to your image. When a user clicks on the image, it will re-direct them to the URL you provide here.
Scaling
Crop to minimum (default) (Resizes the image whilst maintaining the aspect ratio, ensuring the image fills the entire tile.)
Scale to fit (Scales the image so the whole image fits within the container, whilst maintaining aspect ratio.)
Leave untouched (Doesn't scale nor crop the image.)
Hide Image (This will hide the image.)
Borders (If you wish to have borders around your images then you can do so.)
Border width (Choose a suitable width (usually 2-5).)
Border colour (Choose the colour of the border.)
Schedule
The schedule allows you to show or hide an image at a particular time or a given date. Just select the action and choose the date you wish it to happen.
Adding Images to the 'Browser FW/Background' Gallery
The 'Browser FW/Background' gallery is used generally for full width banners or the banner at the top of your page. From your KhooSeller Dashboard, go to My Site > Pages.

Click on the page in the Tree View and go to Edit > Media Gallery.

Open the image upload area by clicking on the image icon on the right-hand edge of your screen.

Click 'Add files'.

Click 'Upload'.

When your upload has finished, you can drag and drop the image into the Browser FW/Background' gallery.
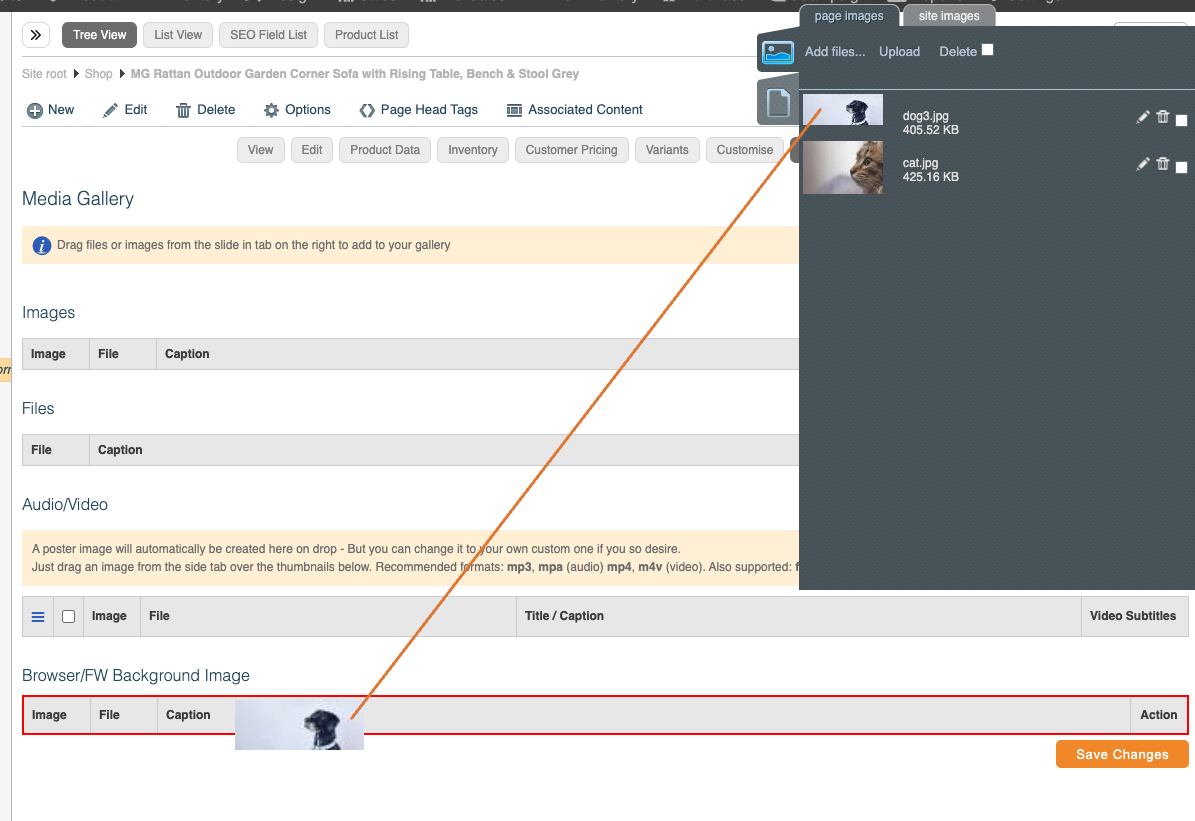
When you've dragged in your image, you'll see it appear in the image gallery. If you have multiple images, you can arrange them by dragging them above or below one another.
More Information
Information
Clicking the pencil icon to the right of the image in the gallery will open a dialogue with additional options for your images.

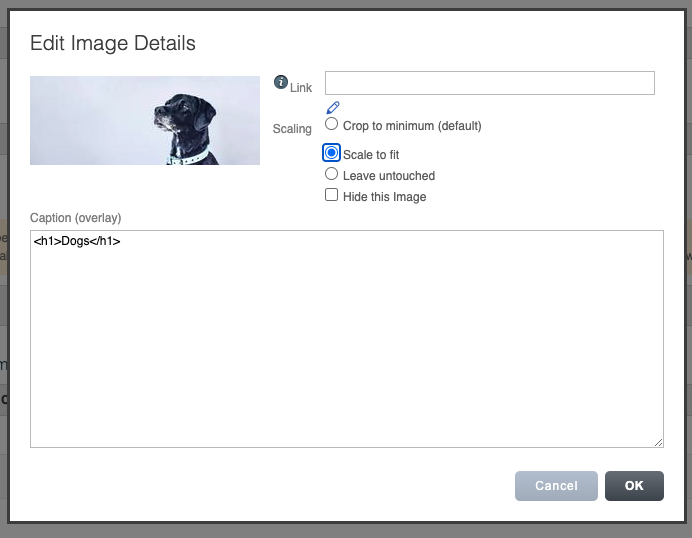
Link
Here you can link the image to another page within your site. Just click the pencil icon under the input to select the page to link to.
Please note it's not possible to add an 'alt tag' to these images since they are background images which are not possible to add alternative text for.
Scaling
Crop to minimum (default) (This option should never be selected for full width banners.)
Scale to fit (Scales the image so the whole image fits within the container, whilst maintaining aspect ratio. This option should always be selected for full width banners.)
Leave untouched (Doesn't scale nor crop the image. This option should never be selected for full width banners.)
Hide Image (This will hide the image.)
Caption
You may want to add a heading or caption if this is your full width banner. This should be copied and pasted from a previous banner within your site and then just the words edited since there will usually be some surrounding code which is helpful for your site in terms of styling and SEO. In the case on this image, just the word 'Dogs' would be edited to your new title.
