Building Mega Menus
With a Mega Menu already styled, you can add items to the menu using these steps.
Since Mega Menu items are attached to navigation items, you first need to find the item you would like to add menu items too.
Go to My Site > Pages.

Click the Page (or Folder) and go to Options > Mega Menu Items.

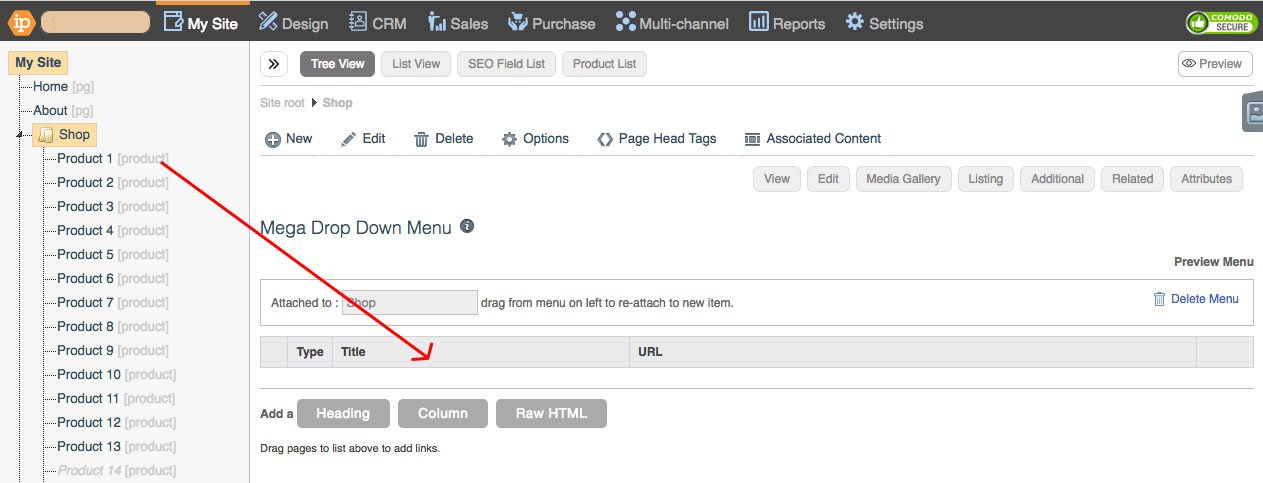
Drag the items you want in your Mega Menu from the left-hand side to the right-hand side area.
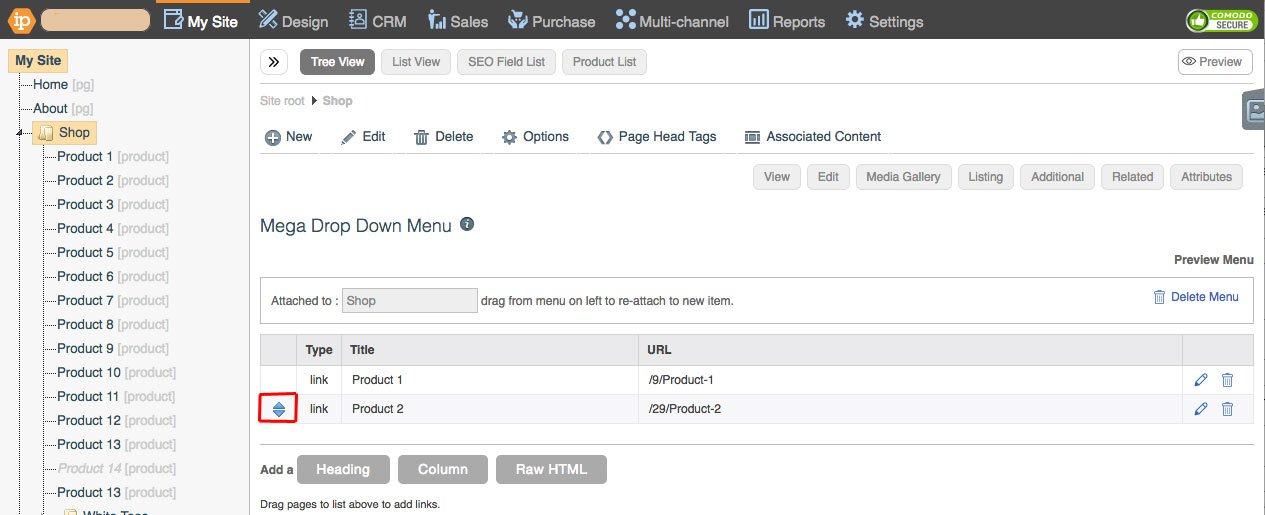
You can re-arrange the Mega Menu items by clicking the blue arrows icon and dragging up or down.
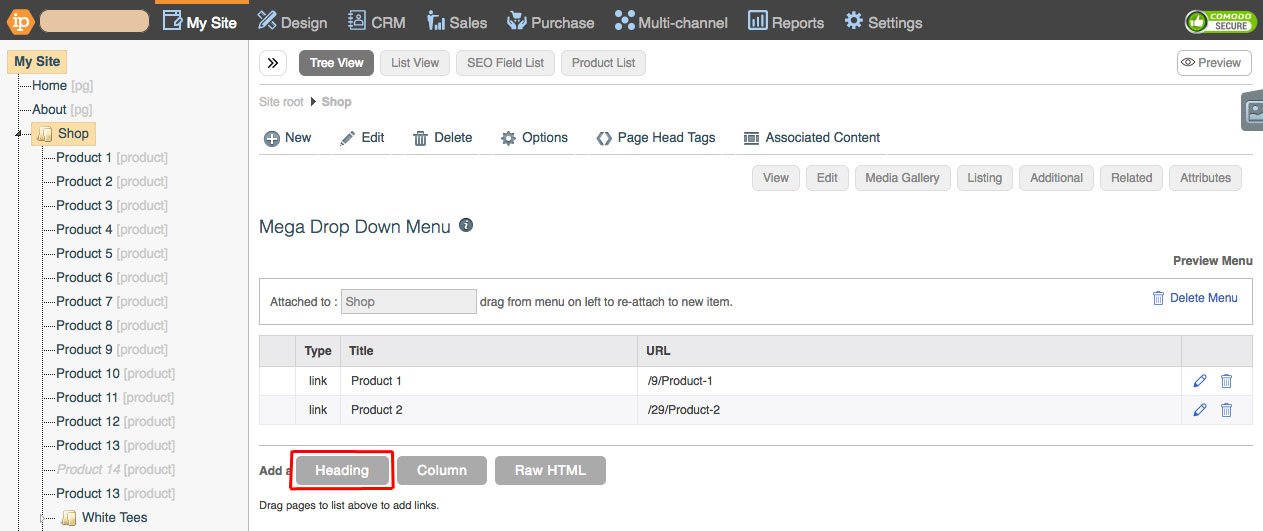
Headings for items on the mega menu can also be added here by pressing the "Heading" button beneath the mega menu table. Items in the table can be edited by clicking the pen icon on the right of their row.
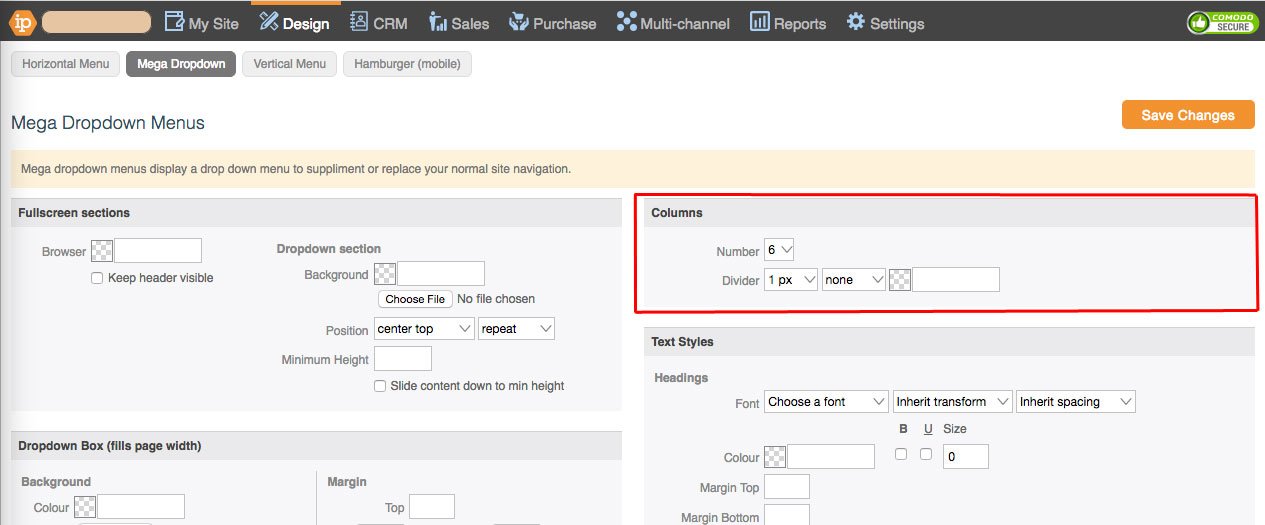
For these columns to work effectively the number of columns for mega menus has to be set within the design area. This number of columns has to match the desired number within the mega menu table created for each nav item. You will need to set this number of columns from a drop-down.
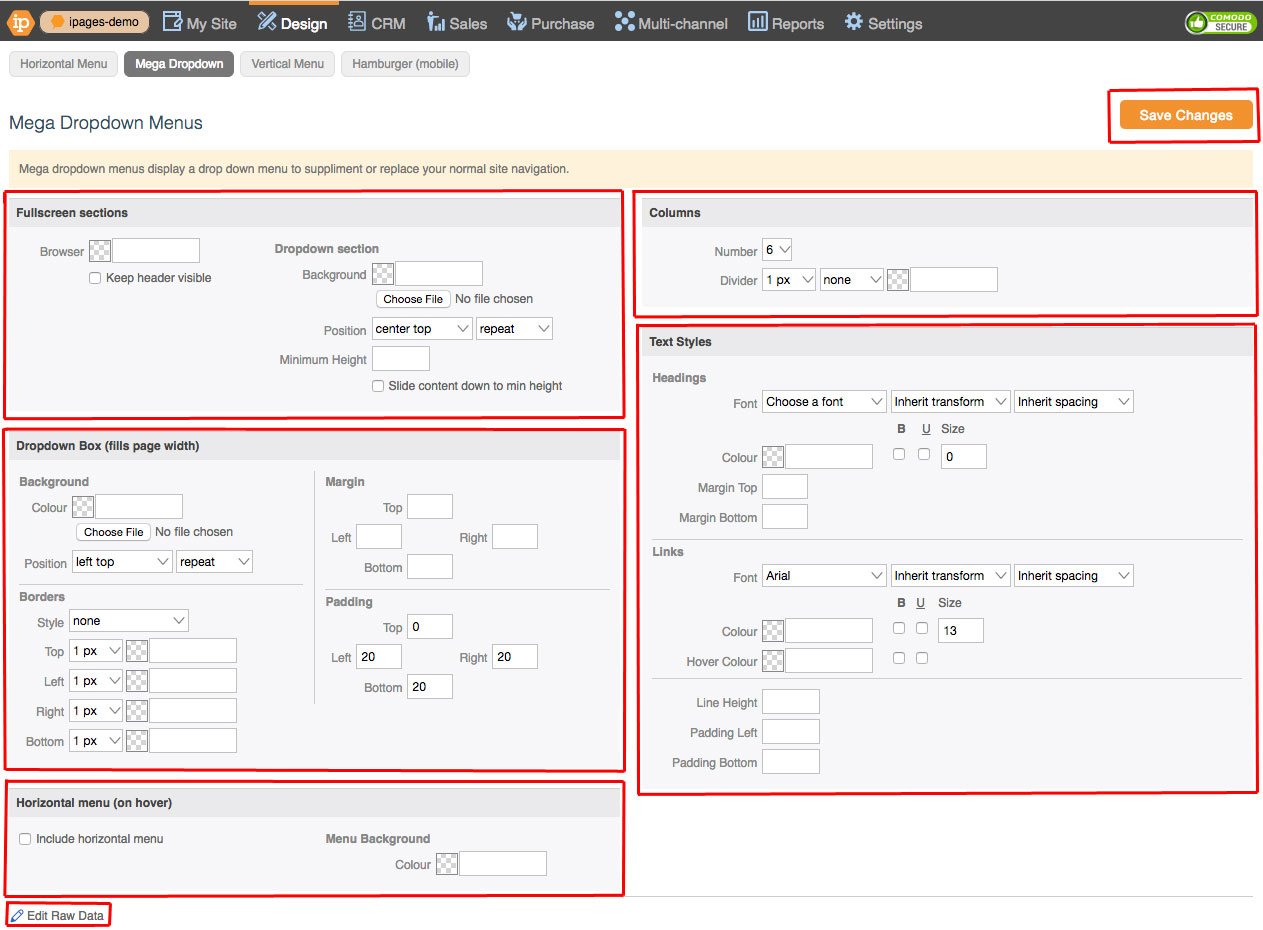
To add columns, go to Design > Menus > Mega Dropdown and fill out the columns boxes.

Save Changes
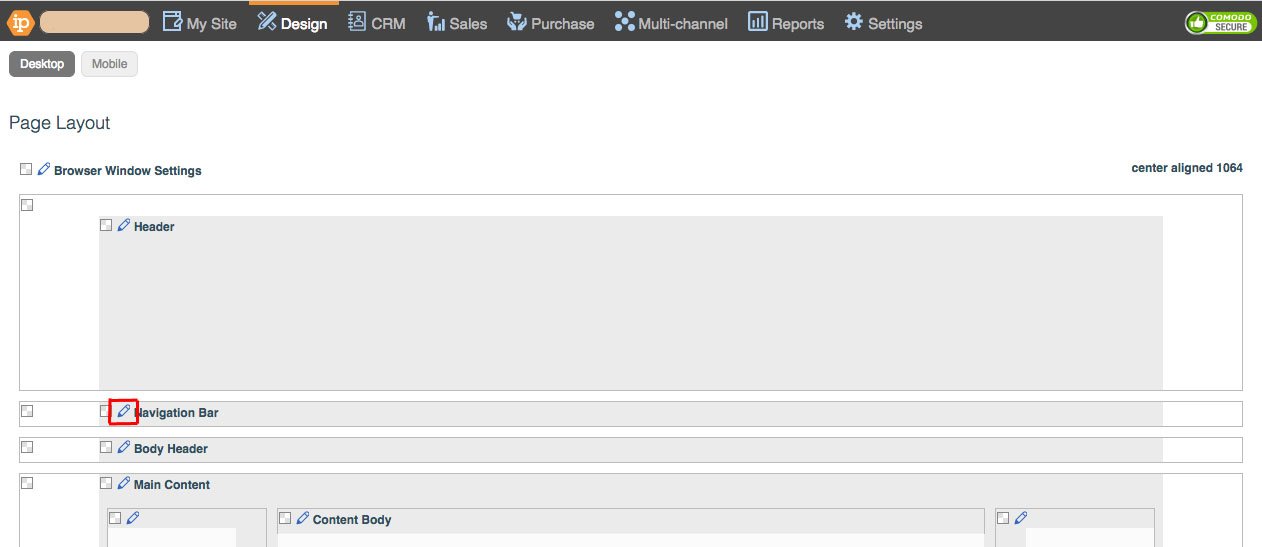
Then go to Design > Page Layout

Click the pencil icon in the navigation bar
Select "Top level with mega menus" from the drop-down next to "Display".

Click 'OK'.
The menu will now need to be styled. This can be done by going to Design > Menus > Mega Dropdown. You can find out more about how this is done here. However, we recommend you leave this to your website designer.

Additional: You can find a list of all the mega menus used by nav items on your website by going to My Site > Tools > Mega dropdowns.


